tisdag 24 januari 2012

A Winter Portrait...

This year, Winter has forgotten to stop by for real, but a few times, it has given an hint of being on its way. Just a few snow flakes make life so much nicer in the Winter darkness. And this I wanted to document for me to have a look at whenever I feel "Christmassy".

Coming home, this is what encounters me:

18/12-2011
Just do not ask me what grass this is, as I haven't got any label under my nose. :O)


18/12-2011
Looking on the other side, three of these have survived the light Winter. These kinds of "cauliflowers" are actually not supposed to do so really. They are supposed to be there and decorate the Autumn and that is about it. We did not bother to actually put them in a nice pot as it was such a temporary thing and they did not seem worth the effort, but that was obviously not correct, given that those three guys are still looking out in January.


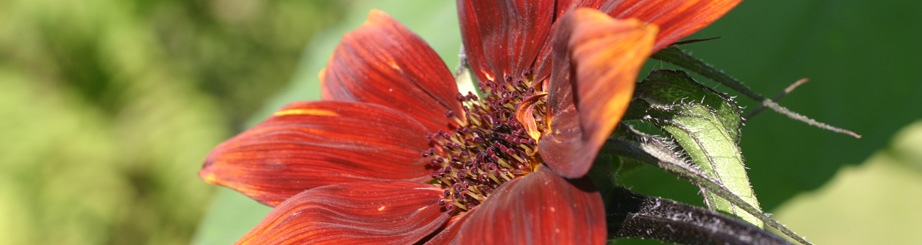
Walking to the right, you will encounter this crazy plant that I really love. In Summertime, it actually displays red leaves, but those I really have no use of. I actually prefer them as they are in Winter really. :O)

This little scary crow is the next in turn among the eye catchers. It normally grows like crazy in summertime, but it does not look as arrogant in wintertime... :O), even if it still takes some space really. This summer I do plan to trim it much harder and keep it look as a ball, as I believed it would look like before I purchased it. Promise :O)


18/12-2011


And guess what: the Elephant grass looks so tall, you can hardly imagine. The gate behind is really taller than 2,5 meters. So you can guess the size of the grass, really. You are not supposed to cut it in Autumn but let it be as it is during the whole winter. It seems the straws can rot if you are not careful. And that we do not want! Really not! In spring time, you can cut them away and wait for them to come back stronger than ever. They are not very quick to start growing again, but when they do they repay for the patience. We have two of these next to each other.


18/12-2011
This is our newest guy. Very little it hardly reaches my ankles. We actually purchased it when it was completely on rebate (if I waited some more time, they probably would have paid me to take it away). Afterwards I realised why it was so cheap: this kind of plants you should not purchase so late in the Autumn as their chances of making through the winter are reduced to a minimum. So now let us hope it will make it anyways, even though I did not play by the book unfortunately. So far so good....
18/12-2011


What is this really... Well, it is hard to say but I'd guess it is Spirea "El diabolo"... It does not look that impressive either in wintertime naked of all leaves... :O) But I love it nevertheless...


18/12-2011


And here we are... our Schoons Bonsai tree. Still little brownish, but I personally feel it looks better than it did last year. So the movement might have taken some improvements with it, who can say.


From some perspective, it really seems healthy (nearly healthy).


And this guy seems very happy too. Making its bed larger seems to have been a pure health cure for our Rhododendron Catawbiense. Note to self: it does not like sun in early spring/late winter and gets easily burnt: cover it or water it for #...@ck's sake this year! Do you want flowers or not really?!


18/12-2011

Not easy to stand still when trying to balance at its height over those sticky guys. Berberis is cute but not very cuddly. Just this special type does look cool in summer, but this winter, which is probably the fifth winter this guy has spent in our garden, I found out it actually gives berries. Crazy!


This is the second building on our lot. Everybody needs a guest house on the premises. This specific house was actually given to Janne as a present by his sister. It came with black details, but I went artistic and added a touch of color... or maybe two... Well, our guests appreciate. Not sure it is because of the color or because of the food it actually also offers....


I am not sure if there is any moment in time where this specific rose does not look like crap... There might have been 2-3 days where some rose looked ok... Maybe some eradication may be on place. Ok, let us give it one more summer chance and rethink on some suitable action thereafter!


Hope it will learn something from its far more beautiful neighbour with time.... the Rose Thérèse de Lisieux. My favorite rose ever... or at least so far.


Apples are not my favorite fruit, or let us rephrase, Swedish apples are not my favorite fruit. So the idea of purchasing a real apple tree that would produce lots of apples that nobody of us really appreciates nor tolerates and let those poor apples rot on our lawn did not sound as an healthy option for our garden. So this decorative kind of apple became the obvious choice. The tree should grow to a larger size, and produce humongous amounts of white flowers, which will turn in late summer into cute red apples that nobody should even consider eating. Obviously a far more suitable option for our little family!


What the heck is this really?!?! The more I look at it the less I understand... Mh.... Weird....


Bambu is the new purchase for this year, the one that actually started a major refurbishing in the garden. And the one that still makes me sleep bad. Hope it does not spread!!!!


Salvia is a good herb but actually not my favorite in any way. I only like it in one way: as involtini, with thin meat slices and cooked ham. It looks pretty though in my opinion. And so far it seems still rather healthy.


And what do you guess this is?!
You have 3 guesses....

1... 2... 3...

Artichoke!!!!!

Let us see if it is an annual or a perennial really... :O)


Yes, gardening and winter is not the first "connection" you think about, but looking at the above I am inclined not to understand why not really! I love winter!

söndag 15 januari 2012

Nam Prik Pao - Chilli paste

For cashew chicken, you need chilli paste.

Ingredients
10 big dried red chillies (home grown ones - Chilli 'Piment d'Espelette')
10 garlic cloves
20 thai shallots
6 tablespoons brown sugar
10 tablespoons lime juice
2 tablespoons small dried shrimps (not necessary if you are vegetarian. We used shrimp paste)
6 tablespoons chilli oil
1 tablespoon vegetable oil

Instructions
Roughly chop all of the ingredients. Grind in a pestle and mortar and mix well. Add the vegetable oil and fry at a low heat until the oil turns red.

Afternoon tea

A typical afternoon tea is a typical British story that I have had a raw model since I was a teen. I remember my English teacher giving me some recipe for the British scones. They did not look anything like those you see in England, but I guess I made something wrong. I would love to know where I put that recipe really. I used to bake those scones very often back then!
But well, without that recipe we managed to put together an acceptable Afternoon tea this time, anyways.
Following the recipes will give an afternoon tea for about 4-6 people depending on how hungry your guests are.

The classical British scones were there.

7/1-2012
We tried to do clotted cream for them, but it turned to nothing we can publish on the internet without making everybody disgusted...

Sandwiches are necessary. This time we went for different kinds.
Chicken curry sandwich was good even if not very original.

Turkey, blue cheese and bacon sandwich was a good combination even if it could have been more simple without bacon.
Lemon and chives salmon sandwich is necessary here to balance with "healthy salmon".
Tuna and mango chutney sandwich was really quite original to my taste buds.
Chevre, raisins and pecan sandwich topped with prosciutto was also very good. Keep it vegetarian if you prefer by skipping the prosciutto, but being an Italian, it was hard to do so...

We also added some "picks" utilizing the strawberries we had left from New Year's Eve's dinner and some pickled mushrooms my parents imported from Italy this year too. This time the Sacla' originals.
7/1-2012
Not very British, but well... All major chefs add their own twist, so this is a good way to start my way to becoming one I guess... :)

Enjoy... I know we did!


Curry Paste

When in Thailand in November 2010 and attended a Thai cooking school in Koh Phi Phi, the first thing we learnt how to do was obviously curry paste. Here is the recipe for red curry paste. If you want to make a green curry paste, use the same recipe but use green peppers. As easy.
There they used a big pot and a wooden stick as mortar and pestle. Maybe one day, I can make one of those guys myself. In the meantime, I'll have to live with the little one I have. Very practical though with a larger one!

Ingredients
20 chillies
1 teaspoon galangal
3 tablespoon lemon grass
3 kafir lime leaves finely sliced
2 tablespoons chopped garlic
3 tablespoons thai shallot
1 teaspoon salt
2 tablespoons chilli oil

Instructions
Roughly chop the ingredients and then simply grind with pestle and mortar. Remember to add the oil last so that you do not splash hot curry paste in your eyes. There is no need to use an electric blender or get a very smooth paste.

Red curry paste

Use red chillies

Green curry paste

Use green chillies
Substitute the chilli oil with regular vegetable oil
Add 1 handful sweet thai basil

Panaeng curry paste

Add 3 tablespoons of ground peanuts to the red curry paste. Note though that I have never tried this recipe for Panaeng curry as I have used the one referred to in the Panaeng curry chicken recipe.

Gai Phad Med Mamuang - Thai cashew chicken

Before I went to Thailand last Winter 2010 I believed Thai food was no good. This statement I kept onto for a few days after arriving in Thailand and I started to loose some weight. Until I started to find out they have some real pearls when it comes to food. One of those was the extremely fatty thai banana pancake with condensed milk. One other dish that was pretty appreciated was also the Thai cashew chicken. We learnt how to cook it when on Koh Phi Phi where we went to a Thai kitchen school where this Thai guy kept us under control under a few hours (we had to pay attention not to do something else than what he said we should do...).
November 2010, Koh Phi Phi

Anyways here is the recipe:

Ingredients
1 Handful Sliced chicken
1 teaspoon chopped garlic
1 tablespoon vegetable oil
1 teaspoon chilli paste (done with our own chillies)
3-4 drops chilli oil
1 tablespoon oyster sauce
1 tablespoon light soy sauce
1 tablespoon sugar
2 tablespoons cashew nuts
1/2 handful onion
1 spring onion

Instructions
Toast cashew nuts in a dry wok at low temperature and then set aside.

Keep at a low heat, put the oil in the wok. Add the chicken. Stir fry until it is half cooked. Then add the chilli paste and garlic and mix well. Add the toasted cashew nuts. Then add the oyster sauce, light soy sauce and sugar. Stir well.

Add the onion. Stir fry until it is half cooked. Add the spring onion, stir well and turn the heat off.

If you like put some drops of chilli oil in the dish until you reach the desired heat.

söndag 8 januari 2012

British Scones

I tasted the British scones in England and in Ireland and they were sooooo gooooood. I could eat bunches. They are normally served with clotted cream, which is a dangerous but wonderful ingredient. Clotted cream is impossible to get fetch of in Sweden. These scones have nothing to do with the classical scones people bake in Sweden. Those are more "American kind" and mostly suitable for savoury purposes. I actually have never got fetch of the original British scones recipe, but this is as near as it gets so far.
I tried to make clotted cream but it turned into a weird thing, so I will not publish the recipe this time. But I do not give up. To remember for my next time I try is the following. Try to only pick up the thick part from the top without getting any fluid cream in it. It is difficult to remove the fluid parts afterwards.
7-1-2012
Ingredients
2,5dl (5dl) flour
1/2tbs (1tbs) sugar
1/2tsp (1tsp) baking powder
1/8tsp (1/4tsp) bicarbonate
1/4tsp (1/2tsp) salt
50gr (100gr) butter directly from the fridge
1/2 (1) egg
1/2dl (1dl) sour milk (filmjölk)
1/2dl (1dl) raisins
For decoration:
1tbs icing sugar
1tbs cream
1/2 egg

Instructions
Turn on the oven to 250degrees Celcius. Mix dry ingredients. Cut butter in small pieces and mix it with the dry ingredients. Mix egg and sour milk and add to the mixture above.
Roll the mixture to 1,5 cm thick and cut out round pieces in wished dimention. The typical dimention would be around 3cm diameter.
Mix the remaining egg part with some cream and 1 tablespoon icing sugar. Brush the mixture onto the top of the scones.
Put them on a baking tray and bake for approximately 10 minutes. Eat warm for best result with clotted cream if you manage do do any.

Turkey, bacon and blue cheese sandwich

The basic recipe is the blue cheese one. Here it adds bacon, but you could as well skip it. It turns out it mosly added that "artificial tube paste" aura around the whole thing and the cream cheese mixture is good enough as it is. Also the smoked turkey is optional. You can use different types of blue cheese. Here I mixed Saint Agur and Gorgonzola as that was what I had at home. You can also use different types of cream cheese: normally, I use mascarpone, here I used creme fraiche, but the original recipe called for Philadelphia cheese.
7/1-2012
 Ingredients
100gr blue cheese (gorgonzola, Saint Agur or similar)
75gr creme fraiche (mascarpone or Philadelphia can be used)
Optional 50gr bacon
Optional 2 slices of smoked turkey

Instructions
Reduce the blue cheese to very small pieces
Fry the bacon to get rid of the fat so it gets very crispy. Cut it or break it then in very small pieces.
Mix the creme fraiche (or similar) with the blue cheese and the bacon crumbles.
Spread the mixture on 2-3 toast bread. Make sure that it is evenly distributed. Put the turkey if you like on it. Seal each sandwich with one toast bread. Cut each sandwich in four pieces.

Serve as is or decorate with a toothpick. I actually used the same ingredients at the top of the toothpick to make clear to the eaters what kind of food they are putting in their mouth, in this case turkey and blue cheese.

Lemon and chives salmon sandwich

7/1-2012
This was much of a new invention. Also went original with najad salmon (a mix of smoked and marinated salmon). Regular smoked salmon would do it too, I believe.

Ingredients
100gr smoked salmon (2 slices)
50gr creme fraiche
4 straws of chives
Grated lemon zest (about half a lemon or less)
Cucumber slices

Instructions
Mix creme fraiche with the sliced chives, the grated lemon zest. If you wish you can taste with salt and pepper, but we didn't as the salmon already brings the "salt" in the sandwich.
Spread the mixture on 4-6 toast bread. Make sure that it is evenly distributed. The amount should not be too thick as you have the same mixture on both sides of the sandwich. Distribute salmon on each side so that you have one layer of salmon all over the toast bread. Again, do not put too much salmon as you have salmon on both sides of the sandwich. Put sliced cucumber on 2-3 of the slices. Put the slices without cucumber on those with. This implies getting a sandwich with following layers (mixture, salmon, cucumber, salmon, mixture).  Cut each sandwich in four pieces.

Serve as is or decorate with a toothpick. I actually used the same ingredients at the top of the toothpick to make clear to the eaters what kind of food they are putting in their mouth, in this case salmon and cucumber. 

Chevre cheese, raisins and pecans sandwich

7/1-2012
The basic recipe does not require any further ingredient than the mixture below. Here though, I decided to add some prosciutto as I had purchased it and did not know what to do with it otherwise. But that was not necessary if you want to keep it vegetarian.

Ingredients
75gr chevre cheese
50gr creme fraiche (you can use philadelphia cheese if you prefer)
1tbs yellow raisins
2tbs pecan nuts

Instructions
Wash raisins with hot water and let then soften up a while.
Cut raisins and pecans in very very small pieces.
Mash the cheese if possible (or cut it many times in multiple directions if you prefer).
Mix all ingredients together.
Spread the mixture on 2-3 toast bread. Make sure that it is evenly distributed. Seal each sandwich with one toast bread. Cut each sandwich in four pieces.
As I said above, I also added a thick layer of prosciutto.

Serve as is or decorate with a toothpick. I actually used the same ingredients at the top of the toothpick to make clear to the eaters what kind of food they are putting in their mouth, in this case chevre cheese and the prosciutto.

Tuna and mango chutney sandwich

This was a rather original sandwich. It is indeed rather sweet, so if you are not a fan of sweet stuff, you might want to reduce the mango chutney amount. It might also be a good idea to reduce possible "big pieces" of fruit in the mango chutney into smaller ones before mixing everything together. This is the recipe as I prepared it this time. Next time I will probably invert the amounts of mayo and chutney.
7/1-2012

Ingredients
1 can of tuna (remove the liquids before adding it)
3/4dl mayonnaise + plus some for the decorations
1dl mango chutney
Salt and pepper
1dl roasted sesame seeds

Instructions
Mix tuna, mayonnaise and mango chutney. Adjust taste with salt and pepper if you feel it is necessary.
Spread the mixture on 2-3 toast bread. Make sure that it is evenly distributed. Seal each sandwich with one toast bread. Cut each sandwich in four pieces.
Decorate each slice of bread by distributing a thin layer of mayonnaise on one of the sides and dip the side in roasted sesame seeds. This makes for decoration and taste at the same time. If you want, you can use a toothpick to decorate and you can use the same ingredients at the top of the toothpick to make clear to the eaters what kind of food they are putting in their mouth, in this case a good suggestion would be to put a piece of tuna and a mango piece on the top of it. This time I forgot to keep some tuna on the side and I was too hungry to bother about the mango piece. But maybe next time?!


Chicken curry sandwich

Chicken curry might not be the most original of  combinations, but sometimes, you just feel like eating it anyway.
7/1-2012
Ingredients
200gr chicken breast
2tsp olive oil
1/2 apple
1dl mayonnaise
1tsp or a little more curry spice

Instructions
Fry chicken in small pieces in a pan with about 1 teaspoon of olive oil.
Fry apple in the same way as the chicken.
Cut the pickled cucumber in very small pieces.

Mix the above prepared ingredients with mayonnaise and curry spice. Adjust taste with salt and pepper.
Spread the mixture on 2-3 toast bread. Make sure that it is evenly distributed. Seal each sandwich with one toast bread. Cut each sandwich in four pieces.

Serve as is or decorate with a toothpick. I actually used the same ingredients at the top of the toothpick to make clear to the eaters what kind of food they are putting in their mouth, in this case chicken and pickled cucumber.

fredag 6 januari 2012

Teapot earrings

Gio' got some time ago a real teapot that I purchased and painted. Now for Christmas, I thought it would be funny to keep the theme and decided to create earrings formed as a teapot and with similar drawings around.

I created them with white Fimo and colored them with acrylic golden color.
21/12-2011
These guys were also very small indeed. See compared to my fingers...
21/12-2011

I used some sterling silver "pin & ring" that I stuck in the teapot. I only used silver in case someone might turn allergic to nickel at some point. This time I kept the "ring" on the outside as you can see on the picture above and made sure that the pin would not slip away by creating a sort of hook that was built into the teapot.

Then I connected the "pin and ring" with a sterling silver earring. The easiest way to connect those was to actually open the ring on the earring. Very easy once you understand what the smart way to go is.

I also created a case for them, suitably chosen to be formed as a cupcake... :O)

Penguins

27/12-2011
Sabrina likes penguins so I needed to do penguin earrings for her. Unfortunately, the one penguin fell on its nose so the beak became flat at the top and when trying to adjust it, it fell off. But glue is no bad tool, really. But the nose is still flat.
27/12-2011
This will make a relatively good Christmas present. Maybe not sooo well done, but nobody can complain, I did not made an effort.

Used white, black and orange modeling clay.
Basically made a little cone in white, covered half of it with black clay. Took two very small black sausages and two very small white sausages and combined them to create wings.
One little cone for the beak and two small triangles for the feet.
At the end of the story, I realized I should have made a tail but the tail on penguins is built in. Not very easy to add it after. Actually, next time, I think I will do a kind of cone with a triangle formed base and then make the top very thin to cover the body. Not sure. Got to test it somewhat!
These guys are rather small... around 1 cm tall... so those big eyes are really much smaller than they look here... :O) It might be a good excuse for them looking far from perfect with this very high zoom factor...? :O)
27/12-2011


To remember for future usage: when warm, pieces seem to easily fall apart. The nose fell off and glue is now needed. Next time I will wait until dry before poking around with the thing. Not sure that is enough yet, but well... :O)
 
Baking 30 minutes at 130 degrees in oven for hardening is necessary.

Tip: The earring piece you can buy in silver has got a "feature" for allowing to actually fix it onto a ring. So nex ttime, I will keep the round part of the silver pin that goes through the body out of the body. Much smarter and cuter!

Cupcakes

The idea of doing cupcakes with Fimo I saw on the Internet. This girl used silicone to do the swirl. I got my own idea of doing "cupcake boxes" as it seemed a little unnecessary to just have a lot of cupcakes for no use. The boxes should be then used as Christmas presents and contain something like earrings or similar. In Fimo also.
But indeed I felt that doing boxes with Fimo would use up my whole Fimo collection and making me a poor girl. I found some "air drying" clay that needs no further handling nor baking. Not sure how good it is, but I thought it was worth trying it. It comes in larger packs and is somewhat cheaper at least.
6/1-2012
In order to get the cupcake shape, I used my silicon muffin stamps that I purchased to actually do soap some few years ago.

21/12-2011
The instructions say that the clay should dry within a few hours. This I do not think is true. I made the cupcake bottom 2 days ago and they still feel rather "cold". "Cold" usually means "not dry".

I colored the bottom part with a mix of Americana's Raw sienna (which was too light to simulate chocolate color) with a good hint of Asphaltum (which was too dark instead). I probably should have added some hint of red, too, but at first I didn't do it. The colour turned out rather dull so at the end I added some red with a more neat result. Probably, I should purchase some "Chocolate" color so I do not need to "mix up and find my way"....
21/12-2011
The final color became rather dull, so I realized the best thing to do would be to actually put some finish on it, which I did and I got a more brilliant result.
27/11-2011

Then I also did some rounds to be the "covers". These rounds can then be topped with silicone.

The difficult task was to find some good toppings for the cupcakes so they would get some decoration.
21/12-2011
After some thinking, I came up with strawberries,
21/12-2011
chocolate pieces, cookies and also some candy dots in two different colours.
27/12-2011