torsdag 21 juli 2011

Blueberry bed

Some basics about American blueberries
  • They need peat to grow and don't like regular garden soil so you need to change the soil where you want them to grow
  • They like to be watered regularly
  • You need more than one plant to get berries as they are not self-fertile.
  • Blueberries grow on (at least) last year's wood
  • They are pretty much liked by bunnies and bambies... which does not go together with the fact that blueberries don't grow on the growth of the current year. If you can, just keep away those nosy animals from the plants with a net or similar wintertime.
The blueberry bed
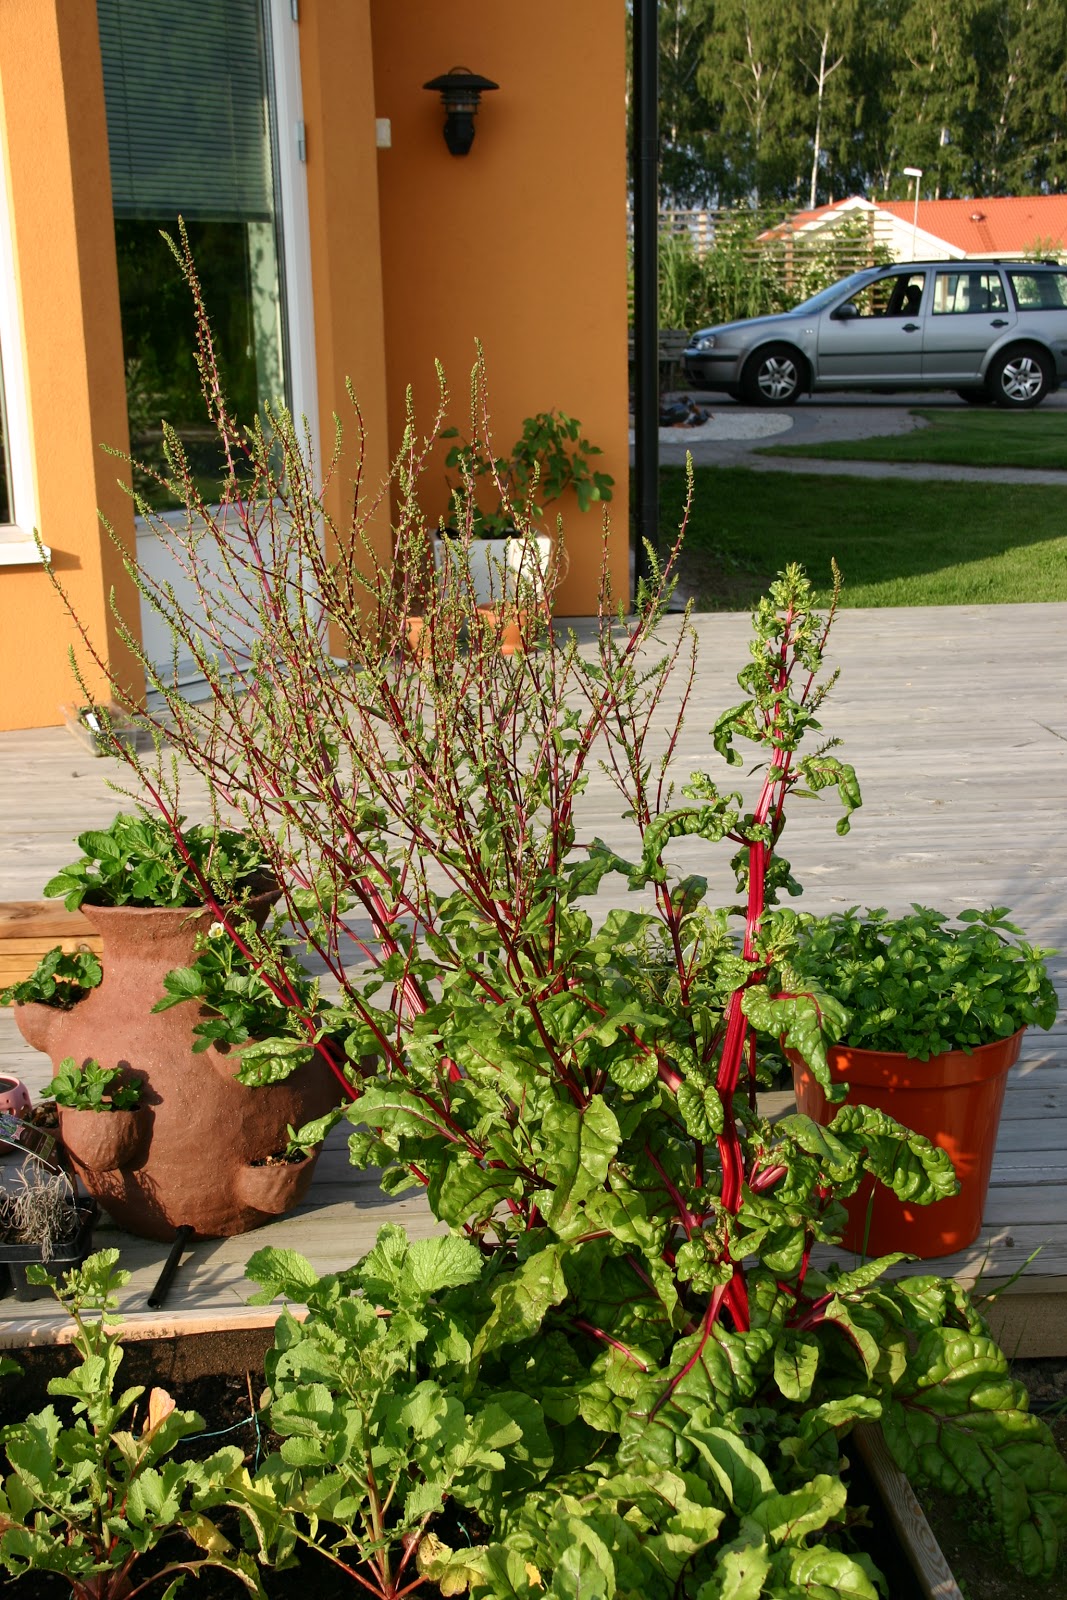
This is our newly furbished blueberry bed. I do expect it to give us blueberries in large amounts by one year or two. Right now, it is mostly one of the plants that make sure we do not go hungry... :O)


The construction
The construction was at the end the following: Dug about 10cm over the board. Dug also for the new blueberries more in depth (around 30cm). Also we dug for a future grape plant in the right corner.
The area was then covered with peat.
We installed an automatic watering system where a hose goes along the back of the bed and hoses are then drawn from there to each and every blueberry shrub. The main hose is without holes, but for each plant, there is a "hole" hose for water distribution.
This whole bed was then covered with wheed  fabric to avoid weed coming from the ground itself. This action payed out for this year. It might create issues later but that I do not care about now. Right now, it is indeed keeping weed to grow there. We finalized the construction by covering the fabric with bark.
As you see, it looks little "empty" right now, but I expect the plants to grow with the years.
The edges were a little of a problem: the original idea was to actually use concrete to define the edges clearly. I realized it would imply a great deal of work and cost to do so. So what we did at the end was to border the bed with bark only and have fabric under it. The automatic lawn mower should be able to go over the edges and cut all grass completely. Let us see how this works.

The Scheme
The blueberry plants we have now are:
Vaccinum corymbosum 'Goldtraube'
Vaccinum corymbosum 'Elisabeth'
Vaccinum corymbosum 'North Country'
Vaccinum corymbosum 'Northblue'
Vaccinum corymbosum 'Darrow' 

This is the "map of blueberries".


Historical background
We started out with three blueberry plants quite a few years ago. We dug holes in the grass. This is how they looked in May 2007, when we first planted them.
May 2007
Fact is, the grass and weeds just grew into the plants and they were very hard to remove. To be honest, it was a real pain in the cakehole....
Blueberries are one of the best plants to have in the garden. They give good and healthy fruits (or so we hope... ;O) ). Even though you might think 3 blueberry plants give enough blueberries for the whole family, I personally wanted more. So I convinced Janne to purchase 2 more. But digging two more holes did not sound very attractive and the idea of skipping the grass between them seemed like a good idea. We were going to build a bed for the blueberries.
We actually hired a guy to do the digging. Quite a few stones had to be eliminated from the area.
May 2011

After a lot of discussions with the idiot we hired, and a lot of back and forth and tough work from our side, we managed to get up the bed as we intended it from the first beginning: with a lot of peat and over the grass level. This is the result after altering back and forth.

Vaccinum corymbosum 'North country'


Highly recommended plant of blueberries!!!! Sweet and large berries!

Latin: Vaccinum corymbosum 'North country' 

Swedish: Amerikansk blåbär 'North country'
English: American blueberries 'North country'
Purchased at Plantagen (I believe) a few years ago


Of the three blueberry plants we first purchased, this is the one that we highly recommend.
It gives very large amounts of blueberries. Very good ones: sweet and large (up to 2 cm). Here you can see a few, not completely ripe ones. When they are ripe, they are larger.
21/7-2011

Also this year, where the other two plants hardly gave results (especially Elisabeth), this one did not have any whatsoever issues. We are enjoying large amounts of blueberries.
2011-08-07: We have been picking good bunches of blueberries nearly every day for over a month now. Really incredible. Hard to understand where they all come from. And there are much more to come it seems.
26/7-2011

It is also the first plant to give blueberries, starting out in the beginning of July. According to the producer's description, it says "august-september". I do not see this to be true. Maybe we got the wrong "name tag"? :O)
It is also has a nice rounded shape that makes it rather decorative.
According to the producer, it should survive up to Swedish zone 5.

Planted in the blueberry bed.

Vaccinum corymbosum 'Elisabeth'

Latin: Vaccinum corymbosum 'Elisabeth'
Swedish: Amerikans blåbär 'Elisabeth'
English: American blueberries 'Elisabeth'
Purchased at Plantagen (I believe) a few years ago

2/7-2011
This is the latest of the three blueberry plants we purchased at the same time. When all other plants have no blueberries left, then this one starts producing a few, not very sweet but still tasty blueberries.
Though, this plant has never really grown to reasonable size and it has not either given a reasonable amount of blueberries. Summarizing, it has been the least productive of all blueberries.

My theory was, we probably got tired of digging and did a too little whole for it. Which might have caused the bad growth. Now we did a new peat bed, and if it had potential and my theory was correct, we'll notice the coming years. Otherwise, we'll have to be ok with the limited amounts of blueberries it gives.

Planted in the blueberry bed.

Vaccinum corymbosum 'Goldtraube'

Latin: Vaccinum corymbosum 'Goldtraube'
Swedish: Amerikans blåbär 'Goldtraube'
English: American blueberries 'Goldtraube'
Purchased at Plantagen (I believe) a few years ago

This blueberry was the one that has actually grown the most. At least in size.
26/7-2011 (sorry about the incredibly ugly tujas behind.... they are the neighbour's.... :O( )
In previous years, it has also given quite a few blueberries. It was the middle blueberry plant, starting to give blueberries somewhere end of July, beginning of August, if I remember it correctly. They are not as sweet as the ones from North country though.

This year we wanted to have more blueberries so we did a whole peat bed around the plant. So hopefully, it will grow more given the additional space for the roots and the fact that it will not have grass and weeds growing around (and into) it.

Producer's instructions
Water normally. Fertilize normally. Should be placed in a sunny position. It will reach a height and width of 1 meter. Tolerates Swedish zone 4

Pinus parviflora 'Schoons Bonsai'

Latin: Pinus parviflora 'Schoons bonsai'
Swedish: Silvertall 'Schoons bonsai'
English: White pine 'Schoons bonsai'

We purchased the pine as we were looking for a pine that could be "bonsai"-like. Given the name, it had very good potential. We planted it in the are that was to become the rockery.
17/5-2007
It never developed and it actually never looked very good. Mostly dry and with branches where you would prefer them not to be. This is as bad as it got really:
21/5-2011
This year we decided. Let us throw the little ugly guy away and purchase a brand new Japanese maple.
But again, none of us had the heart. During gardening 'refurbishing', some spot came up where we could 'dump' the tree temporarily until we collected the courage for throwing it away.
Since we moved it there, it seemed to enjoy the more moisty soil and has thrived (compared to before). Very likely it won't be thrown out any longer.
26/7-2011


I personally think, the rockery was simply too dry and maybe even too sunny. Maybe it will even grow better now? I might maybe even dare cutting it a little for a good result. Any suggestions on where to cut exactly?! :O)

Producer's instructions
Water normally. Fertilize normally. Requires a sunny location.
Will become 1,5 meters high and also 1,5 meters wide.
Tolerates Swedish zone 3

Ligustrum vulg. 'Atrovirens'

Latin: Ligustrum vulg. 'Atrovirens'
Swedish: Vintergrön liguster
English: Evergreen privet
Purchased after moving in (no dates available)

My idea was to have formed plants. In my imagination, I would cut these plants as mushrooms or balls. I wanted 3 mushrooms in different sizes. As I personally feel buxus stinks (litterally!), I decided evergreen privet would be the solution: evergreen and formable.
I wanted them in my Zen area. With stones. Calm.
I read somewhere that you can form balls easier and quicker by purchasing 3 plants and put them very next to each other and cut them into one ball.
We purchased the cheapest evergreen privets in a pack of ten. One more than needed as I wanted 3 mushrooms.
We planted them all anyways. Here you can see two of the future mashrooms...


To clarify reality: they might be called evergreen, but they do loose all their leaves during winter and the branches froze down all winters since we planted them. In Spring, it takes a while for them to come back to life. At least one of them has died completely. So the picture above represents pretty much the way they look in Spring.
30/12-2009
And if you need any proof that they are not winter green, here you are....
Their size is therefore pretty limited as they freeze back each winter.

Anyways, this is how they look now.

We have managed to put stones around two of them. The other one is on the "flower bed side". Note to myself: the area surrounding these shrubs is no good soil. It was the one that has always been there the last years without any improvement at all. Maybe not a good idea to plant stuff around there. Anyways one more thought might be to refine the distribution of stones around it as the black tissue below is very much visible as of now!

Azalea japonica 'Rosalind'

7/6-2009
We purchased this plant a few years ago. It was in flower when we purchased it and we were very much in love with the "strong" color it had. But the actual charmer were the leaves: rounded form with a green/yellow colour that turns into orange in Automn. It did not fit in in the rest of the garden, but we did not care. We purchased it anyway and put it next to the rhododendrons. It felt right to keep the plants that need peat in one locations.

Everything was fine, until the first really cold winter came in 2009-2010. Then it looked like it had died. It looked dry and hopeless in spring. After a few months, some few greenish leaves became visible and we realised, it had made it. Some branches gave a few flowers, too. The rest got flower mummies (rather cute, but I think they were actually sick or at least impested with undesired fungus. I do not know. We did though not have the heart to throw the poor plant away.
Winter 2010-2011 was as cold and the plant did not do so well either. In spring I removed all flower mummies and somewhat it seemed to get some of its greens back. A few flowers were there, too. Keep it or through it away?!
21/5-2011
Right now, we took it into consideration when "refurbishing" in the garden. But worst case scenario, we'll have to find a substitute for it. Not completely impossible either... :O)
On the other hand, we did not follow the instructions very carefully. E.g. we did not ever remove the faded flowers.

Producer's description
Soak plant in water before planting. Dig hole of twice the width and depth of the ball. Insert plant and fill up with soil. Water well after planting.
Care/cutting: To support flowering of the next year, carefully remove faded flowers.
Flowering time: May/June, pure pink with fine red blotches.
Growth/size: Upright growing, 80cm high and 120cm wide.
Position: Light shade, loose, humus-rich, moist, but well drained soil
Fertilization/nutrition: Use customary commercial fertilizers (few calcareous) in spring and summer.
Hardyness: Frost tolerant (Deb's note: not really true! It did take serious damage each cold winter)

tisdag 5 juli 2011

Coconut pottery....

During our last vacation in Thailand, we realised that it was pretty common to see orchids hanging in trees (or anywhere else for that matter) in coconuts. The guys use "full scale coconuts", that is the whole thick skin. This makes me believe that if they do that, there must be a very good reason. Probably orchids like that.
As it is not as easy to get fetch of whole coconuts and the coconuts you find here do not either have the thick skin nor are of a "reasonable" size, I came up with the idea of doing coconut substitutes with clay.
After a head count of orchids at home, we came up with 4. It turned out later it was five and that we had misplaced one of them.... To make a long story short, I did 4 "coconuts":
Picture taken on 5/7-2011
This was basically the last project during Spring term 2011. I actually had to "tiptoe" into the workshop after hours and quickly glaze them (at the same time as I could fetch my strawberry pot... hehe...). Did not take longer than 10 minutes, I believe... And then it was not easy to get them out after the "baking"...  But yesterday, I managed. My teacher is really wonderful and helpful! Incredible lady....
I used "brown" clay and put a very thin layer of cream colored glaze with dots. That combination (with a thin layer) normally gives some kind of brownish result, which it indeed did this time, too. They are darker in reality than on the picture (probably because of the flash).
Each coconut has got three holes for hanging them up in the trees and are rounded in the bottom. Though it is still possible to make them stand whenever necessary. Me very happy. Orchids are now going on vacation in the garden!

I have actually used some orchid moss or whatever that is, some orchid compost and a green thread to fix the orchids in the pots. This is how they looked like at the end of the story after a whole lot of fixing and tricking about with the thread (very unconfortable behaviour by the way)
29/7-2011
Fortunately, I have a big tree that can carry them without issues (or so I hope). So the next step was to hang them up. Not easy to find a suitable place (the tree is definitively not really "well combed") but at the end they have been up since beginning of August.
23/8-2011


lördag 2 juli 2011

Rose Thérèse de Lisieux

This is according to me the most beautiful rose in the world. I saw in www.graines-baumaux.com a few years ago and wanted to purchase it but kind of "lagged" too long and then it was gone from the offering. Unfortunately, it did not come back for a few years. I have been looking for it everywhere but no luck. All of a sudden, it was back. But here again, lagging did not do any good and gone it was. This year was the time. All of a sudden, it was back so quick as hell, I ordered 3 rose plants of this specific kind.
At the beginning, mid March, I did not have any place to put them so I put them in a bucket each. They actually survived and some 1-2 weeks ago, buds became visible. Now, I am enjoying the flowers and there are many more to come.
Picture taken on 2/6-2011

5/7-2011: This is then how the flowers develop with time. Note how quick the rose size increased the last 4 days!
Picture taken on 5/6-2011

Also, now I have managed to plant 2 out of 3 plants in flower beds.
???: Plant one in the corner flower bed.
30/6-2011: Plant two in the ground in the hosta flower bed.
The third is also soon on its way! Happy! Hope they survive the winter. You never know with those French guys.... :O) If they do not survive the winter, I think I will put it in my routine to purchase new ones every year... ;O)

Orange lillies

Latin: Lilium (whatever)
Swedish: Orangea liljor
English: Orange lillies
(Sorry about the lack of specifics... purchased those at the supermarket and those guys are not very specific in general... Or was it really at Plantagen but I am getting senile?!?!)

These are indeed Janne's lilies as he got them at his birthday quite a few years ago.
We have no idea of what kind of plant it is, what it needs or anything else. But we do know that it gives wonderful flowers, unless those ugly rabbits get to them before.
We have never even tried to do something special with them. They just come back year after year. We moved them from one place to another. That did not seem to bother them at all. We did that in spring time some years ago if I recall it correctly.
Here is a full view of a flower.
It gives a whole lot of flowers and it seems to be getting bigger for each year.
We highly recommend them to anybody that likes orange flowers as they are not only cool but very healthy!

fredag 1 juli 2011

White chocolate fluff

This recipe has also been found in Bakglädje but for some strange reason (read "lazyness") I modified it somewhat :O),  but if you want to take the "pro" way, you can follow the link here. According to the source, you can decide what kind of chocolate to use. I went for the white chocolate one. Remember: white chocolate contains basically cocoa butter and condensed milk powder. So if you are lactose allergic, be prepared to suffer. I personally think it is worth the suffering... :O)

Ingredients
100gr white chocolate chips (can be enough with 70-90gr if you do not want so much white chocolate)
1,5dl cream suitable for whipping

Instructions
Warm up cream without reaching cooking temperature. Dump in the white chocolate chips and mix until they are completely melted.
Let the mixture rest over night in the fridge.
The day after you will be able to whip it as "hard as you desire".

This recipe tasted very good, but in the cake, it kind of disappeared among the rest of the ingredients.Very likely it comes to its rightful position when eaten by itself or with less other ingredients. Next time I will try it on vanilla cupcakes I guess.

Sugar paste

The first time I used sugar paste, I actually purchased it ready-made. Then following happened:
- I read the ingredients' list
- I tried to work with it and it dried out within a very very short period of time and turned hard
Then I found this recipe at Bakglädje and so I collected courage and gave it a try.
The original recipe with some light modification comes below.

Ingredients
1 tablespoon gelatin powder
60gr cold water (0,6 dl)
175gr white syrup (1,25 dl) (according to reliable sources, it can be substituted with glucose)
1 tablespoon glycerol (which seems to be the same as glycerine)*
2 tablespoons neutral oil or coconut fat (rape oil works)
800-900gr confectioner's sugar (I opted for the 800gr and it seemed to work fine)
0,5 teaspoon vanilla extract
Icing colour can be used for colouring

Instructions
Mix the gelatin powder with the cold water in a metal bowl and let it rest until it absorbs and becomes thick. Now it is time to melt the mixture by putting the bowl over a pot with cooking water. The gelatine will melt down and become fluid. Now add syrup and glycerol and mix together thoroughly. Mix in the oil and remove the bowl from the heat. Note: I did not get any glycerol as the pharmacy I went to did not have it in stock. But the result was doubtful and wrinkled. So I do believe that you do need it. You can also add the vanilla extract now and according to the original recipe also coloring. Personally, I prefer to let it white and color it when ready with different colors (so I only need one batch for all colors). But I guess, it becomes more "pro"-like if you do it as originally thought?! Here again, I haven't tried and probably won't either unless proven necessary first.

I put the mixture in my Kitchen Aid with dough tool and added little confectioner's sugar at the time. Or at least I started out with "a little at the time" and got bored pretty quickly. So I added everything at one time and the Kitchen Aid handled the "little at the time" per default (it takes some time until everything is mixed in anyways). I had only 800gr sugar and I felt it was enough. The resulting sugar paste did not dry out at all during the 5 days the cake lasted. Which I personally think that is ideal. My guess is, the more sugar you add, the quicker it dries. But I haven't really "tested" and I very likely never will on purpose. :O) I have the feeling you want the sugar paste to dry quickly if you do flowers or stuff. But I do not really know...

Do not worry that the mixture is sticky. It will become malleable with time. I personally think it looks very very good after mixing. Had it not been so sticky and sweet, I probably would have eaten half... :O) I took a picture, but unfortunately I probably forgot the memory card in the camera...

Put the mixture in plastic film and cover it up completely with multiple layers to avoid drying out. In the original recipe, it is recommended to put it in a plastic bag and an air tight jar, I didn't as I did not read the original recipe as thoroughly as I should, but nothing "scary" happened.

Let the mixture rest for at least 24h. Theoretically, it can be preserved for a very long time as it is basically mostly sugar. But I haven't tested it myself yet. Probably, here, putting it in an air-tight jar becomes much more important. It does not need to be in the fridge. I let mine at room temperature.

I colored my sugar paste before usage with different colors. I used "gelatin colors" as that is the only edible color I got. The manufacturers of such colors state they are necessary for all cake baking and should not be substituted by caramel color that influence the consistency of the final result. Me not sure. But I believe in all kinds of marketing messages ;O)

But, hey, all summed up, I was rather satisfied with the result apart from the "wrinkle" problem.... Next time I will go out of my way to find glycerol, really!

Note: I found the Glycerol in a Pharmacy. Do not get scared by the fact it tells it is for conservation of leaves and stuff. I have wikied it and it seems it is edible. The result was much less "wrinkly" so make sure you have it in the mixture.

Note: Try to colour into the sugar paste in advance. Ideally directly after you actually have done the sugar paste. I did not do it that way, but it became very difficult to handle and it became cracked. If not directly, at least some day or two in advance so it sits a little before you need to use the sugar paste.


torsdag 30 juni 2011

Janne's birthday cake

Janne's birthday, this year again, and here is my (only?!) chance to bake a cake.
This time I wanted to have sugar paste to cover the cake, and I wanted to do sugar paste myself instead of purchasing it ready-made. Found a good recipe from a very trustworthy source of recipes, Bakglädje, which I personally highly recommend as it is an infinite source of tasteful stuff (ok, maybe not really infinite, but very tasteful indeed).

So this was the result from my baking activity:

From the far, the sugarpaste looks normal, but on a nearer look, it was rather "crumbled" and did not look very good.

This was probably due to the fact that I was not able to follow the recipe due to missing ingredients. Also the coloring was a real tough task. The color did not look near what I was aiming at. I wanted to have a "sun-orange" and a "orange-red" color but it rather turned into a "carrot orange" color and a "orange-pink" one. The green was not leave green either directly. What to do what to do... :O)

Anyway, I actually think the 3D-idea was rather neat, even though the implementation was as doubtful as usual.

As Janne is a real chocoholic, I decided to give in and make him a chocolate cake for once...
I personally love to fill the cake with fruit rather than only going for the classical mousse. I personally think it tastes healthier, but the "stability" of the cake is not top notch. Or maybe again, it is something I do wrong. But I think it was stable enough. In order to make the cake more stable even though it contains fruit, I normally put a string of icing, white chocolate chip icing to be specific, on the border of the cake for each layer and fill it with the wished fruit. Here, I used sliced bananas for the first layer and sliced strawberries for the second one.
I decided to complete the layers with a thin layer of white chocolate fluff at the top of each layer.
Unfortunately, the chocolate cake was so friable, it looked rather messy when sliced, but it did taste rather good anyways! And my little goldilocks seemed to appreciate anyways... :O)

Chocolate cake...

This recipe originates from the wilton.com recipe collection. In my opinion, the guys have normally very good recipes. In this specific case, there was nothing wrong with the taste in itself (especially when licking the batter off the bowl), but I personally think the baked cake was very friable.
This is how it looked:
which obviously made me very happy I intended to decorate it rather than serving it as is...
This is anyway the "original" recipe halved if you want to make smaller cakes. But if you want a whole batter, double up.

Ingredients

85gr butter
1 cups dark chocolate chips
170gr sugar
2 small eggs
1 tsp vanilla extract
140gr all-purpose flour
1/2 tsp baking soda
1/4 tsp salt
1,75dl water

Instructions
Preheat oven to 350°F. Spray pan with vegetable pan spray. Melt 1/2 cup chocolate chips and butter together either in microwave oven or on top of range over low heat. Stir until chocolate is completely melted. Pour into electric mixer bowl. Add sugar; beat until well blended. Beat in eggs, one at time. Add vanilla. Stir in 1/2 cup flour, baking soda and salt; mix well. Add remaining flour and water; mix until smooth. Pour into prepared pan. Bake 40-45 minutes or until cake tests done. Place pan on cooling rack. Sprinkle remaining 1/2 cup chocolate chips over cake; let stand 2-3 minutes or until chips have softened. Gently spread melted chocolate over top of cake. Cool completely in pan before covering.

Personally, I was not very impressed by the idea of melting the chocolate chips at the top of the cake. The result was a very friable top cover. In the filled cake it just gave a crunchy texture. Both of these points I could really as well have lived without.

måndag 27 juni 2011

Milk bread

This recipe was just a "yeast hack", that is it was not based on a real recipe, but rather inspired by a kind of sweet bread you can purchase in Italy and that is very good with salty "charcuterie" such as salami, prosciutto or similar. The bread is called "panini al latte" and I used to love those when I was a little girl.
This bread was let to rest during the night, so it is a good breakfast bread.
The result is though not even near the original taste, but they were very "quick" to bake and very easy.
Here it is an example of how the "chemist" and exactness in baking is overrated.

Ingredients
3,5dl milk
25gr yeast
1,5 tablespoon honey
1/4 teaspoon salt
flour (add flour until the dough looks as a dough should, but allow for some stickiness)
(Sorry, forgot again to measure the flour, but trust yourself!!!! Have you baked with good results before, you'll be fine)

Instructions
I used my Kitchen Aid with the dough tool.
Mix the cold milk with the yeast. Add the flour a little at the time until the feeling is right (soft, doughy but a tiny little sticky).
Add salt and honey. Mix 5 minutes.
Put in an oiled plastic container with a lid and place in the fridge over night. If you do not have lids to the containers, use plastic foil. The size will have to allow the dough to grow. Expect it to triplicate itself.

In the morning, make buns out of the dough. My dough was enough for about 12 buns.
You can make the buns in different flavors.
Some alternatives
Pumpkin seeds
I brushed the buns with a yolk as I had three such in the fridge and I thought it could be a good use of them. You can sure use other possible alternatives such as butter, milk or similar if you do not feel like opening an egg for some few buns. Then I put a whole deal of seeds on the buns.

Sweetened
I put 1 spoon icing sugar in the yolk and mixed it. It was a little hard to get the sugar to mix with the egg yolks without making a meringue, but such details do not stop me. The purpose here was to get the yolk to get a sweet taste, not to make it look good.... Let us focus on the important things here... :O) Then I brushed it on the buns.

Let the buns rest for about 20-30 minutes and then bake them in the oven at 200degrees Celsius for about 15 minutes.

torsdag 23 juni 2011

Chili 'Piment d'Espelette'

Latin: Capsicum Annuum
Swedish: Chilipeppar 'Piment d'Espelette'
English: Chili 'Piment d'Espelette'

We planted four of these guys a lot of time ago, on the 27/2-2011. Though, only two plants actually made it to "grown stage". Unclear why, but well: it seems these two will pretty much cover our needs for chili for the next 5 years to come (not because of the high production but rather low usage).
They looked pretty small for a very long time. Following instructions is not always the best way to go. Those recommended to put them in a cool place, which we did, but for that reason, they stayed small for months.
Moving them back into our warm house again, made them start to grow. Shortly ago, they have also started to flower.
The flowers do not look like much and are rather difficult to spot, but under scrutiny, I personally think they look rather sweet.
In order to get chili  we understood we were forced to pollinate the flowers, so we have done some "touching work". And that has given results -  two so far to be specific...

And surprise: have been able to spot those two guys. We very happy. Last time we got a chili plant to take care of we killed it within 1 week time... so this is really going over expectations.
31/7 - Head count for chili fruits gave at least 8, some of which rather large and some very small. But there are at least 4-5 new flowers. All chilis are still very grey and do not look anything like "ripe" chilis yet.

Producer's Description
This sort is ideal for outdoor cultivation. Fruits rich in vitamine can be used fresh, dried or deep frozen. It is possible to mix the chilis to chili powder. It is good for one's well-being. Remove the hot seeds before eating. It requires heat, but it can be grown in a pot on the patio, on the balcony or in the greenhouse. Water and fertilize regularly.

Producer's Instructions
Sow sparsely on moist sowing soil. Cover with a thin layer of soil. Keep most at 20-22 degrees and cover with plastic foil. After they have grown, keep them in a light and chilly place... :) Plant them in pots separately when the plans are around 5cm tall. They may be planted outside when night temperature is over 8 degrees.
Planting: January through March
Fruits: July through the beginning of October
Plant at 0,5cm depth with a distance to other plants of 40cm in all directions

tisdag 21 juni 2011

Vaccinium corymbosum 'Darrow'

Latin: Vaccinium corymbosum 'Darrow'
Swedish: Amerikanska blåbär 'Darrow'
English: Swamp blueberries 'Darrow'

26/7-2011
Purchased on the internet via www.graines-baumaux.fr around March 2011. Received the plant somewhere in March but I could not plant it outside before we got our flower beds enlarged. That was guessingly something around 31st May or 1st of June. But it could as well have been one week after. Unsure right now. By that time the plant had started loosing all flowers and no real blueberries were left on the plant. The plant itself had started looking like crap also.
7/8-2011: The plant has come back to full color, which is a good sign, but still does not have the harmonious form I wish it had....

Producer's description
The production of blueberries is distributed during 6 to 8 weeks. American variety with large fruits of good quality, sweet and aromatic. Very productive, with production between 15th of July to the 15th of September.


Sun to half sun
Flowering time: April-May
Harvest: July and August
Height: 1,25cm
Pruning: Not recommended

Planted in the blueberry bed.

Gypsophila elegans 'Crimson'

Latin: Gypsophila elegans
Swedish: Röd sommarslöja 'Crimson'
English: Baby's Breath 'Crimson'
Purchased 22-02-2011 from Impecta.

We sew it on the 9th June 2011. They seem to have come up in larger amounts and spots. Not a very regular growth it seems. Also I probably placed them too near to each other. But well, now I cannot do anything about it and will have to wait and see if it works anyways.
On the 15th June 2011, there was not much to see yet:

Summer's summary 2011-08-23: This plant grew very quick and it seems most seeds also developed. We distributed on a given area and it became very rich with flowers. The flowers are neat.
To say it was invasive is a too hard expression, but indeed they really took their place. The dahlia that was surrounded by them had to fight for space. Nothing tragic though. This will be a standing purchase every year, even though I might not plant as much of it next year now that I know how easy they grow. And yes, they are as beautiful as the catalog wants us to believe. Note though that if you look from above, there might be some places where they lay down.

Producer's description 
It produces incredible amounts of red, graceful small flowers. It fits well in bouquets as well as in flower beds. Here is an image downloaded from Impecta, just to give you an idea until I have my own pictures:
So I hopefully have something to look forward to.

Producer's instructions
Sow directly on the ground as soon as the soil is not frozen anylonger.

Helianthus annuus (Purpureus-gr.)

Latin: Helianthus annuus (Purpureus-gr.)

Swedish: Purpursolros ' Moulin Rouge'
English: Sunflower 'Moulin Rouge'
Purchased in Spring 2011 on the internet from Impecta

I planted the seeds as described in the producer's instructions some time in April I guess. Nearly all seeds grew but I personally feel all stems became far from strong. I felt that they were very unstable and as of now, 2011-06-21, many of them are either broken, dried out or do look ugly in some other way. I personally think they should have been planted out in their final place far earlier. I would guess it has been the main issue here.
I will still try to plant them outside very soon, hoping to save at least some of them, but I do not keep my hopes to high....

Producer's description
A magical sunflower with deep purple red petals with an ebony center. The stem is strong, dark red and the plant branches out. The flowers are 8-10cm. It is very suitable in bouquets. Interesting background flower or solitaire. Here is a picture I downloaded from Impecta:

Producer's instructions
Pre-cultivate indoors in April or sow directly outdoors in May or June. Soak the seeds 24 hours before planting them. Make sure that the soil is fertilized. After they have grown, they should be put in a light and cool area. They should be planted directly when there is no risk for night temperatures under 0.

måndag 20 juni 2011

Echinacea purpurea "Primadonna Deep Rose"

Latin: Echinacea purpurea "Primadonna Deep Rose" 
Swedish: Rosa Rudbeckia
English: Primadonna Deep Rose

I planted them in root trainers, can't remember when exactly, but I'd guess end of February-beginning of March 2011?! They have been in there since. Really time to plant them to their final destination very soon indeed.

Producer's information
This cultivar is supposed to give very large flowers between 12-15cm with light pink colour. It is a flower from the prairie that fits perfectly in the Swedish flower beds. On a picture I downloaded from the internet it looked like this:

Producer's instructions
Can be cultivated indoors between February and March or it can be cultivated outside in both vases and directly on the ground May to September. Cover seeds with a thin layer perlite.

Sowing: February to September
Growing time: 1-3 months
Full sun
Flowering period: July to October
Height: 75cm
Perennial
Zone: 4-5


Lobularia maritima 'Violet Queen'

 Latin: Lobularia maritima 'Violet Queen'
Swedish: Strandkrassing 'Violet Queen'
English: Sweet Alyssum 'Violet Queen'

Got this idea that we need to purchase flowers that can fit among others in rockeries. Our rockery is still not half way to being "plantable" but we need to make sure it will be very soon otherwise there will be a whole deal of sad flowers around here. Or they will end as all other flowers we purchased too early for the rockery. They dried out before they could be planted outside. But I believe it won't happen this once...

Producer's description
It gives a lot of small violet flowers with an inviting perfume. It can be used to cover the ground. It is ideal for borders and rockeries. This is a picture I downloaded from the producer:

Producer's Instructions
It should be cultivated indoors March to April or it can be sown directly outdoors as soon as the soil is not frozen any longer. Can be planted outside when the night temperature is above 0.

Sowing: March to May
Growing time: 5-15 days
Full sun to half sun
Flowering period: June to September
Height: 10cm
Annual

Berkheya Purpurea 'Silver Spikes'

Latin: Berkheya Purpurea 'Silver Spikes'
Swedish: Tistelaster ' Silver Spikes'
English: Purple Berkheya 'Silver Spikes'

I planted quite a few of these but it turns out, I should have not dumped them outside already. Difficult to know why I was not careful enough when it came to reading the instructions. What will happen now?
2011-07-13: Still alive, but not really kicking. Gave them some "flower power" yesterday. Let us see if it gives it a boost. On the other side, maybe I should not expect flowers this year....

Producer's description
Originally from South Africa. It is a perennial flower that normally already blooms during the first year. It is light lilac, with flowers of a size of 8cm . The leaves are long, zigzaged and somewhat spiny, downy leaves.
It can be grown in most soils. Here is also a picture I downloaded.

Producer's instructions
Should be cultivated inside February-March or they can be sown outside May-September. It is recommended to cover the seeds with a thin layer perlite. They can be planted outside in Automn or in Spring.

Perennial

Ptilotus Exaltatus 'Joey'

Latin: Ptilotus Exaltatus 'Joey'
Swedish: Kattamarant 'Joey'
English: Lamb's Tail 'Joey'

I purchased the seeds Spring 2011 from www.graines-baumaux.fr and I thought they looked cool. Little funny even. This is the way they are supposed to look when grown.
I am actually mostly fascinated by the flower. Here it is in a downloaded close-up.
I actually saw them at Blomstertorget. They are far from beautiful, but still rather cool. Let us hope they will grow.

It seems to be original from Australia (well, hope it does not create any imbalance over here just for revenge?!) . According to the supplier, the flower is supposed to be between 7cm and 12cm, but the ones I saw in the shop were rather 5cm than 12cm. The height of the plant should be around 40cm.
Can be grown in flower beds as well as vases.
Annual flower (actually it is a perennial, but not in Sweden).


torsdag 16 juni 2011

Spring onion 'White Lisbon'

Latin: Allium fistulósum
Swedish: Salladslök ' White Lisbon'
English: Spring onion 'White Lisbon'
Producer: Bröderna Nelson, purchased some while ago this spring I think

Planted 8/6-2011 (See scheme for raised bed)
The raised bed contained for the most soil from the EcoCenter (low quality soil), but it was topped with high qualitative soil for vegetable cultivations from Hasselfors (2,5 bags).
15/6-2011 Still nothing
20/6-2011 Saw the first "greens" sticking out of the ground. Weeew....
Ok, I do understand it does not look like much to the rest of the world, especially those used to ICA Maxi's spring onions, but well...  I am rather happy... :O)

Producer's description
Delicate salad vegetable that can be sown and grown the whole summer. The taste is mild and good as a tender vegetable.
Producer's instructions
Can be planted april to June in soil rich in organic material, ideally rich in lime. It is suggested to plant a row every other week in order to always have tender plants. In order to keep the taste mild, water. To avoid onion flies, cover with non woven.
Depth: 1cm
Distance between plants: 2cm
Distance between rows: 25cm
Full sun
Harvest: About 2 months after sowing

onsdag 15 juni 2011

Beets 'Rhubarb Chard'

Latin: Beta vulgaris
Swedish: Mangold 'Rhubarb chard'
English: Beets 'Rhubarb chard'
Producer: Bröderna Nelson, purchased at ICA Maxi 7/6-2011


Salad is supposed to be watered from below from what I understood from some vegetable growing books. Right now all watering is done automatically with sprinklers, which could be a problem.
This kind of salad seems to be the exact kind you can buy for a lot of money in the  Supermarkets. There, they normally are small dark green leaves with red stems. Look great and taste even better there. Let us see what it results with now. I actually tried to cultivate them before, but I never had the heart to actually eat them as baby leaves. They did not grow very well either. The large ones became very "tough" and could be cooked and treated as spinach. But they were not very exciting. But I do not give up yet.
After nearly two months and some few picking sessions, they have reached around 15cm height. They are still soft and can be eaten as they are.

Note though: In spring we realized that one plant was coming up from the ground. Probably some reminiscent from last year. We have moved it around a lot because of the digging and this is how it looked like some days ago.
26/7-2011
So ithis plant is not really an annual: it can even survive the winter. This plant is highly decorative, far more decorative than what it looks in the picture itself.

Planted 8/6-2011 (See scheme for raised bed)
The raised bed contained for the most soil from the EcoCenter (low quality soil), but it was topped with high qualitative soil for vegetable cultivations from Hasselfors (2,5 bags).
15/6-2011: I am not 100% but there seems to be one leaf or two? Will have to double-check again.
Just realized this special kind of salad has got only 55% growability, that is kind of each other seed with come up. Not very much to play with, really... :O(

tisdag 14 juni 2011

Baby Leaf Sallad

Latin: Lactuca Sativa
Swedish: Sallat, Baby Leaf
English: Baby Leaf Salad

Producer: Bröderna Nelson, purchased at ICA Maxi 7/6-2011

Salad is supposed to be watered from below. Right now all watering is done automatically with sprinklers, which could be a problem. This salad looked colorful, so we just took it.

Planted 8/6-2011 (See scheme for raised bed)
The raised bed contained for the most soil from the EcoCenter (low quality soil), but it was topped with high qualitative soil for vegetable cultivations from Hasselfors (2,5 bags).
13/6-2011: The whole row seems to have come up already with small leaves on this day, but I did not check before that as I was on a short vacation. So they do really grow very quick it seems.

Producer's Description
This salad is a mixture of salad types: 'Amerikanischer Brauner', 'Salad Bowl', 'Little Leprechaun', 'Red Salad Bowl', 'Rouge Grenobloise' and 'Favourite'. Should be cultivated in rows near each other.
Producer's Instructions
Can be planted early, basically as soon as the ground is not frozen any longer. It is possible to cultivate it in different heats until August. The salad seeds actually need temperate climate, not over 20 degrees to grow. It enjoys loose soil rich in organic material, but it can grow basically in most soils. Needs regular watering.

Depth: 0,5cm
Distance between plants: 2-3cm
Distance between rows: 10-12cm
Full sun to half sun
Harvest: About 1,5 month after sowing, which can mean from May to October

Organic Radish 'Saxa 2'

Latin: Raphanus sativus
Swedish: Rädisa 'Saxa 2'
English: Radish 'Saxa 2'
Producer: Bröderna Nelson, purchased at ICA Maxi 7/6-2011

Radish is supposed to be a very easy vegetable to grow. It is recommended to be planted "among rows" of other vegetables as those may take a long time to grow while radish is very quick at growing. This makes the surface being exploited twice instead of only once.

Planted 8/6-2011 (See scheme for raised bed)
The raised bed contained for the most soil from the EcoCenter (low quality soil), but it was topped with high qualitative soil for vegetable cultivations from Hasselfors (2,5 bags).
I personally preferred to keep it in its own rows. Maybe little wasteful. Will have to consider another approach for next year maybe? Did not use any non woven, which actually I should as it is the recommendation of the producer.
13/6-2011: First plants already there, but I did not check before that as I was on a short vacation. So they do really grow very quick it seems.
5/7-2011: And this is the size by July.
Note: That's my hand, not a two-years-old's....

Producer's description
Easy to cultivate and can be harvested quickly after planting. Round and red radish. Can be sown among other vegetables as it will be ready for harvest before other vegetables are.
Producer's instructions
Can be sown as early as the soil is not frozen any longer up until September.
It prefers loose soil rich in organic material. To avoid attacks from insects, it is recommended to cover it with non woven.

Depth: 1cm
Distance between plants: 2-3cm
Distance between rows: 10-20cm
Full sun to half sun
Harvest: About 1,5 month after sowing, which can mean from May to October

Organic Beetroot 'Juwakugel'

Latin: Beta vulgaris L.
Swedish: Rödbeta 'Juwakugel'
English: Beetroot 'Juwakugel'
Producer: Bröderna Nelson, purchased at ICA Maxi 7/6-2011

Planted 8/6-2011 (See scheme for raised bed)
The raised bed contained for the most soil from the EcoCenter (low quality soil), but it was topped with high qualitative soil for vegetable cultivations from Hasselfors (2,5 bags).
Planted a whole row with these guys. Hope they taste good.
15/6-2011: First plant spotted.
 
Producer's description
Beetroot worth cultivating and with a good taste. With a round form and dark red color throughout. Suitable to be eaten as an early vegetable but also good pickled.
Producer's instructions
Do not sow too early as it could bloom. Sow May to Swedish Midsummer (around the 23th of June). Soak the seeds some hours before sowing to speed up their growth.
Prefers soil rich in organic material that keeps the moist.
Depth: 2cm
Distance between plants: 5cm
Distance between rows: 40cm
Full sun to half sun
Harvest: August-September

Big big vase and strawberries

Strawberries are very good. Found a type that sounded very good and was supposed to be sown in hanging vases.
So, well, a vase with a lot of openings seemed to me like a good planting option for such a kind of strawberries. Here it is:

Size is xxx and there are 9 openings (thought of adding more but it was indeed a very tedious work and got bored after the second one already... :O) ). Even though it does not look like much, it is rather large. Here there is a picture of me with it for reference:

It used a clay with 40% chamotte for stability. What exact kind I will try to find out.It took me 4 lessons to do this and it was pretty difficult as the clay kind of dried pretty quickly, which did not give very much time for "adjustments". When adding the openings, that were rather soft, a lot of cracks popped up when drying. Tried to repair them. They did not come back after the first nor the second baking. Some kind of "half cracks" are on the bottom but they are at least not visible. Hope the vase will survive my planting activities.

No glaze was used at all. The result was unsure. It could turn terracotta or brown and mine definitively turned out brown, even though there are some red (not really visible in the picture though) spots.

From the top, this is how it looks. 

As usual it is not a work of art, and it is definitively not precisely made, but I think it was pretty cool anyways. :O)
So now there are only two things left to do: planting and hope it does not crack!
3/7-2011: Strawberry plants got planted in the pot. The plants looked very small and suffering after planting. So some kind of "worry" about them not making it was definitely there. At the top, I also added one lippia dulcis plant.
5/7-2011: The plants had already grown. Look at the picture after 2 days from planting
Picture taken on 5/7-2011
 And also a shot of the lippia dulcis plant.
Let us see where it goes within one week or two if the growth is so noticeable after 2 days!