torsdag 30 juni 2011

Janne's birthday cake

Janne's birthday, this year again, and here is my (only?!) chance to bake a cake.
This time I wanted to have sugar paste to cover the cake, and I wanted to do sugar paste myself instead of purchasing it ready-made. Found a good recipe from a very trustworthy source of recipes, Bakglädje, which I personally highly recommend as it is an infinite source of tasteful stuff (ok, maybe not really infinite, but very tasteful indeed).

So this was the result from my baking activity:

From the far, the sugarpaste looks normal, but on a nearer look, it was rather "crumbled" and did not look very good.

This was probably due to the fact that I was not able to follow the recipe due to missing ingredients. Also the coloring was a real tough task. The color did not look near what I was aiming at. I wanted to have a "sun-orange" and a "orange-red" color but it rather turned into a "carrot orange" color and a "orange-pink" one. The green was not leave green either directly. What to do what to do... :O)

Anyway, I actually think the 3D-idea was rather neat, even though the implementation was as doubtful as usual.

As Janne is a real chocoholic, I decided to give in and make him a chocolate cake for once...
I personally love to fill the cake with fruit rather than only going for the classical mousse. I personally think it tastes healthier, but the "stability" of the cake is not top notch. Or maybe again, it is something I do wrong. But I think it was stable enough. In order to make the cake more stable even though it contains fruit, I normally put a string of icing, white chocolate chip icing to be specific, on the border of the cake for each layer and fill it with the wished fruit. Here, I used sliced bananas for the first layer and sliced strawberries for the second one.
I decided to complete the layers with a thin layer of white chocolate fluff at the top of each layer.
Unfortunately, the chocolate cake was so friable, it looked rather messy when sliced, but it did taste rather good anyways! And my little goldilocks seemed to appreciate anyways... :O)

Chocolate cake...

This recipe originates from the wilton.com recipe collection. In my opinion, the guys have normally very good recipes. In this specific case, there was nothing wrong with the taste in itself (especially when licking the batter off the bowl), but I personally think the baked cake was very friable.
This is how it looked:
which obviously made me very happy I intended to decorate it rather than serving it as is...
This is anyway the "original" recipe halved if you want to make smaller cakes. But if you want a whole batter, double up.

Ingredients

85gr butter
1 cups dark chocolate chips
170gr sugar
2 small eggs
1 tsp vanilla extract
140gr all-purpose flour
1/2 tsp baking soda
1/4 tsp salt
1,75dl water

Instructions
Preheat oven to 350°F. Spray pan with vegetable pan spray. Melt 1/2 cup chocolate chips and butter together either in microwave oven or on top of range over low heat. Stir until chocolate is completely melted. Pour into electric mixer bowl. Add sugar; beat until well blended. Beat in eggs, one at time. Add vanilla. Stir in 1/2 cup flour, baking soda and salt; mix well. Add remaining flour and water; mix until smooth. Pour into prepared pan. Bake 40-45 minutes or until cake tests done. Place pan on cooling rack. Sprinkle remaining 1/2 cup chocolate chips over cake; let stand 2-3 minutes or until chips have softened. Gently spread melted chocolate over top of cake. Cool completely in pan before covering.

Personally, I was not very impressed by the idea of melting the chocolate chips at the top of the cake. The result was a very friable top cover. In the filled cake it just gave a crunchy texture. Both of these points I could really as well have lived without.

måndag 27 juni 2011

Milk bread

This recipe was just a "yeast hack", that is it was not based on a real recipe, but rather inspired by a kind of sweet bread you can purchase in Italy and that is very good with salty "charcuterie" such as salami, prosciutto or similar. The bread is called "panini al latte" and I used to love those when I was a little girl.
This bread was let to rest during the night, so it is a good breakfast bread.
The result is though not even near the original taste, but they were very "quick" to bake and very easy.
Here it is an example of how the "chemist" and exactness in baking is overrated.

Ingredients
3,5dl milk
25gr yeast
1,5 tablespoon honey
1/4 teaspoon salt
flour (add flour until the dough looks as a dough should, but allow for some stickiness)
(Sorry, forgot again to measure the flour, but trust yourself!!!! Have you baked with good results before, you'll be fine)

Instructions
I used my Kitchen Aid with the dough tool.
Mix the cold milk with the yeast. Add the flour a little at the time until the feeling is right (soft, doughy but a tiny little sticky).
Add salt and honey. Mix 5 minutes.
Put in an oiled plastic container with a lid and place in the fridge over night. If you do not have lids to the containers, use plastic foil. The size will have to allow the dough to grow. Expect it to triplicate itself.

In the morning, make buns out of the dough. My dough was enough for about 12 buns.
You can make the buns in different flavors.
Some alternatives
Pumpkin seeds
I brushed the buns with a yolk as I had three such in the fridge and I thought it could be a good use of them. You can sure use other possible alternatives such as butter, milk or similar if you do not feel like opening an egg for some few buns. Then I put a whole deal of seeds on the buns.

Sweetened
I put 1 spoon icing sugar in the yolk and mixed it. It was a little hard to get the sugar to mix with the egg yolks without making a meringue, but such details do not stop me. The purpose here was to get the yolk to get a sweet taste, not to make it look good.... Let us focus on the important things here... :O) Then I brushed it on the buns.

Let the buns rest for about 20-30 minutes and then bake them in the oven at 200degrees Celsius for about 15 minutes.

torsdag 23 juni 2011

Chili 'Piment d'Espelette'

Latin: Capsicum Annuum
Swedish: Chilipeppar 'Piment d'Espelette'
English: Chili 'Piment d'Espelette'

We planted four of these guys a lot of time ago, on the 27/2-2011. Though, only two plants actually made it to "grown stage". Unclear why, but well: it seems these two will pretty much cover our needs for chili for the next 5 years to come (not because of the high production but rather low usage).
They looked pretty small for a very long time. Following instructions is not always the best way to go. Those recommended to put them in a cool place, which we did, but for that reason, they stayed small for months.
Moving them back into our warm house again, made them start to grow. Shortly ago, they have also started to flower.
The flowers do not look like much and are rather difficult to spot, but under scrutiny, I personally think they look rather sweet.
In order to get chili  we understood we were forced to pollinate the flowers, so we have done some "touching work". And that has given results -  two so far to be specific...

And surprise: have been able to spot those two guys. We very happy. Last time we got a chili plant to take care of we killed it within 1 week time... so this is really going over expectations.
31/7 - Head count for chili fruits gave at least 8, some of which rather large and some very small. But there are at least 4-5 new flowers. All chilis are still very grey and do not look anything like "ripe" chilis yet.

Producer's Description
This sort is ideal for outdoor cultivation. Fruits rich in vitamine can be used fresh, dried or deep frozen. It is possible to mix the chilis to chili powder. It is good for one's well-being. Remove the hot seeds before eating. It requires heat, but it can be grown in a pot on the patio, on the balcony or in the greenhouse. Water and fertilize regularly.

Producer's Instructions
Sow sparsely on moist sowing soil. Cover with a thin layer of soil. Keep most at 20-22 degrees and cover with plastic foil. After they have grown, keep them in a light and chilly place... :) Plant them in pots separately when the plans are around 5cm tall. They may be planted outside when night temperature is over 8 degrees.
Planting: January through March
Fruits: July through the beginning of October
Plant at 0,5cm depth with a distance to other plants of 40cm in all directions

tisdag 21 juni 2011

Vaccinium corymbosum 'Darrow'

Latin: Vaccinium corymbosum 'Darrow'
Swedish: Amerikanska blåbär 'Darrow'
English: Swamp blueberries 'Darrow'

26/7-2011
Purchased on the internet via www.graines-baumaux.fr around March 2011. Received the plant somewhere in March but I could not plant it outside before we got our flower beds enlarged. That was guessingly something around 31st May or 1st of June. But it could as well have been one week after. Unsure right now. By that time the plant had started loosing all flowers and no real blueberries were left on the plant. The plant itself had started looking like crap also.
7/8-2011: The plant has come back to full color, which is a good sign, but still does not have the harmonious form I wish it had....

Producer's description
The production of blueberries is distributed during 6 to 8 weeks. American variety with large fruits of good quality, sweet and aromatic. Very productive, with production between 15th of July to the 15th of September.


Sun to half sun
Flowering time: April-May
Harvest: July and August
Height: 1,25cm
Pruning: Not recommended

Planted in the blueberry bed.

Gypsophila elegans 'Crimson'

Latin: Gypsophila elegans
Swedish: Röd sommarslöja 'Crimson'
English: Baby's Breath 'Crimson'
Purchased 22-02-2011 from Impecta.

We sew it on the 9th June 2011. They seem to have come up in larger amounts and spots. Not a very regular growth it seems. Also I probably placed them too near to each other. But well, now I cannot do anything about it and will have to wait and see if it works anyways.
On the 15th June 2011, there was not much to see yet:

Summer's summary 2011-08-23: This plant grew very quick and it seems most seeds also developed. We distributed on a given area and it became very rich with flowers. The flowers are neat.
To say it was invasive is a too hard expression, but indeed they really took their place. The dahlia that was surrounded by them had to fight for space. Nothing tragic though. This will be a standing purchase every year, even though I might not plant as much of it next year now that I know how easy they grow. And yes, they are as beautiful as the catalog wants us to believe. Note though that if you look from above, there might be some places where they lay down.

Producer's description 
It produces incredible amounts of red, graceful small flowers. It fits well in bouquets as well as in flower beds. Here is an image downloaded from Impecta, just to give you an idea until I have my own pictures:
So I hopefully have something to look forward to.

Producer's instructions
Sow directly on the ground as soon as the soil is not frozen anylonger.

Helianthus annuus (Purpureus-gr.)

Latin: Helianthus annuus (Purpureus-gr.)

Swedish: Purpursolros ' Moulin Rouge'
English: Sunflower 'Moulin Rouge'
Purchased in Spring 2011 on the internet from Impecta

I planted the seeds as described in the producer's instructions some time in April I guess. Nearly all seeds grew but I personally feel all stems became far from strong. I felt that they were very unstable and as of now, 2011-06-21, many of them are either broken, dried out or do look ugly in some other way. I personally think they should have been planted out in their final place far earlier. I would guess it has been the main issue here.
I will still try to plant them outside very soon, hoping to save at least some of them, but I do not keep my hopes to high....

Producer's description
A magical sunflower with deep purple red petals with an ebony center. The stem is strong, dark red and the plant branches out. The flowers are 8-10cm. It is very suitable in bouquets. Interesting background flower or solitaire. Here is a picture I downloaded from Impecta:

Producer's instructions
Pre-cultivate indoors in April or sow directly outdoors in May or June. Soak the seeds 24 hours before planting them. Make sure that the soil is fertilized. After they have grown, they should be put in a light and cool area. They should be planted directly when there is no risk for night temperatures under 0.

måndag 20 juni 2011

Echinacea purpurea "Primadonna Deep Rose"

Latin: Echinacea purpurea "Primadonna Deep Rose" 
Swedish: Rosa Rudbeckia
English: Primadonna Deep Rose

I planted them in root trainers, can't remember when exactly, but I'd guess end of February-beginning of March 2011?! They have been in there since. Really time to plant them to their final destination very soon indeed.

Producer's information
This cultivar is supposed to give very large flowers between 12-15cm with light pink colour. It is a flower from the prairie that fits perfectly in the Swedish flower beds. On a picture I downloaded from the internet it looked like this:

Producer's instructions
Can be cultivated indoors between February and March or it can be cultivated outside in both vases and directly on the ground May to September. Cover seeds with a thin layer perlite.

Sowing: February to September
Growing time: 1-3 months
Full sun
Flowering period: July to October
Height: 75cm
Perennial
Zone: 4-5


Lobularia maritima 'Violet Queen'

 Latin: Lobularia maritima 'Violet Queen'
Swedish: Strandkrassing 'Violet Queen'
English: Sweet Alyssum 'Violet Queen'

Got this idea that we need to purchase flowers that can fit among others in rockeries. Our rockery is still not half way to being "plantable" but we need to make sure it will be very soon otherwise there will be a whole deal of sad flowers around here. Or they will end as all other flowers we purchased too early for the rockery. They dried out before they could be planted outside. But I believe it won't happen this once...

Producer's description
It gives a lot of small violet flowers with an inviting perfume. It can be used to cover the ground. It is ideal for borders and rockeries. This is a picture I downloaded from the producer:

Producer's Instructions
It should be cultivated indoors March to April or it can be sown directly outdoors as soon as the soil is not frozen any longer. Can be planted outside when the night temperature is above 0.

Sowing: March to May
Growing time: 5-15 days
Full sun to half sun
Flowering period: June to September
Height: 10cm
Annual

Berkheya Purpurea 'Silver Spikes'

Latin: Berkheya Purpurea 'Silver Spikes'
Swedish: Tistelaster ' Silver Spikes'
English: Purple Berkheya 'Silver Spikes'

I planted quite a few of these but it turns out, I should have not dumped them outside already. Difficult to know why I was not careful enough when it came to reading the instructions. What will happen now?
2011-07-13: Still alive, but not really kicking. Gave them some "flower power" yesterday. Let us see if it gives it a boost. On the other side, maybe I should not expect flowers this year....

Producer's description
Originally from South Africa. It is a perennial flower that normally already blooms during the first year. It is light lilac, with flowers of a size of 8cm . The leaves are long, zigzaged and somewhat spiny, downy leaves.
It can be grown in most soils. Here is also a picture I downloaded.

Producer's instructions
Should be cultivated inside February-March or they can be sown outside May-September. It is recommended to cover the seeds with a thin layer perlite. They can be planted outside in Automn or in Spring.

Perennial

Ptilotus Exaltatus 'Joey'

Latin: Ptilotus Exaltatus 'Joey'
Swedish: Kattamarant 'Joey'
English: Lamb's Tail 'Joey'

I purchased the seeds Spring 2011 from www.graines-baumaux.fr and I thought they looked cool. Little funny even. This is the way they are supposed to look when grown.
I am actually mostly fascinated by the flower. Here it is in a downloaded close-up.
I actually saw them at Blomstertorget. They are far from beautiful, but still rather cool. Let us hope they will grow.

It seems to be original from Australia (well, hope it does not create any imbalance over here just for revenge?!) . According to the supplier, the flower is supposed to be between 7cm and 12cm, but the ones I saw in the shop were rather 5cm than 12cm. The height of the plant should be around 40cm.
Can be grown in flower beds as well as vases.
Annual flower (actually it is a perennial, but not in Sweden).


torsdag 16 juni 2011

Spring onion 'White Lisbon'

Latin: Allium fistulósum
Swedish: Salladslök ' White Lisbon'
English: Spring onion 'White Lisbon'
Producer: Bröderna Nelson, purchased some while ago this spring I think

Planted 8/6-2011 (See scheme for raised bed)
The raised bed contained for the most soil from the EcoCenter (low quality soil), but it was topped with high qualitative soil for vegetable cultivations from Hasselfors (2,5 bags).
15/6-2011 Still nothing
20/6-2011 Saw the first "greens" sticking out of the ground. Weeew....
Ok, I do understand it does not look like much to the rest of the world, especially those used to ICA Maxi's spring onions, but well...  I am rather happy... :O)

Producer's description
Delicate salad vegetable that can be sown and grown the whole summer. The taste is mild and good as a tender vegetable.
Producer's instructions
Can be planted april to June in soil rich in organic material, ideally rich in lime. It is suggested to plant a row every other week in order to always have tender plants. In order to keep the taste mild, water. To avoid onion flies, cover with non woven.
Depth: 1cm
Distance between plants: 2cm
Distance between rows: 25cm
Full sun
Harvest: About 2 months after sowing

onsdag 15 juni 2011

Beets 'Rhubarb Chard'

Latin: Beta vulgaris
Swedish: Mangold 'Rhubarb chard'
English: Beets 'Rhubarb chard'
Producer: Bröderna Nelson, purchased at ICA Maxi 7/6-2011


Salad is supposed to be watered from below from what I understood from some vegetable growing books. Right now all watering is done automatically with sprinklers, which could be a problem.
This kind of salad seems to be the exact kind you can buy for a lot of money in the  Supermarkets. There, they normally are small dark green leaves with red stems. Look great and taste even better there. Let us see what it results with now. I actually tried to cultivate them before, but I never had the heart to actually eat them as baby leaves. They did not grow very well either. The large ones became very "tough" and could be cooked and treated as spinach. But they were not very exciting. But I do not give up yet.
After nearly two months and some few picking sessions, they have reached around 15cm height. They are still soft and can be eaten as they are.

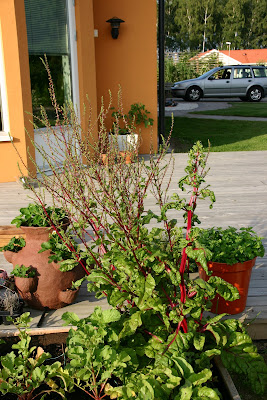
Note though: In spring we realized that one plant was coming up from the ground. Probably some reminiscent from last year. We have moved it around a lot because of the digging and this is how it looked like some days ago.
26/7-2011
So ithis plant is not really an annual: it can even survive the winter. This plant is highly decorative, far more decorative than what it looks in the picture itself.

Planted 8/6-2011 (See scheme for raised bed)
The raised bed contained for the most soil from the EcoCenter (low quality soil), but it was topped with high qualitative soil for vegetable cultivations from Hasselfors (2,5 bags).
15/6-2011: I am not 100% but there seems to be one leaf or two? Will have to double-check again.
Just realized this special kind of salad has got only 55% growability, that is kind of each other seed with come up. Not very much to play with, really... :O(

tisdag 14 juni 2011

Baby Leaf Sallad

Latin: Lactuca Sativa
Swedish: Sallat, Baby Leaf
English: Baby Leaf Salad

Producer: Bröderna Nelson, purchased at ICA Maxi 7/6-2011

Salad is supposed to be watered from below. Right now all watering is done automatically with sprinklers, which could be a problem. This salad looked colorful, so we just took it.

Planted 8/6-2011 (See scheme for raised bed)
The raised bed contained for the most soil from the EcoCenter (low quality soil), but it was topped with high qualitative soil for vegetable cultivations from Hasselfors (2,5 bags).
13/6-2011: The whole row seems to have come up already with small leaves on this day, but I did not check before that as I was on a short vacation. So they do really grow very quick it seems.

Producer's Description
This salad is a mixture of salad types: 'Amerikanischer Brauner', 'Salad Bowl', 'Little Leprechaun', 'Red Salad Bowl', 'Rouge Grenobloise' and 'Favourite'. Should be cultivated in rows near each other.
Producer's Instructions
Can be planted early, basically as soon as the ground is not frozen any longer. It is possible to cultivate it in different heats until August. The salad seeds actually need temperate climate, not over 20 degrees to grow. It enjoys loose soil rich in organic material, but it can grow basically in most soils. Needs regular watering.

Depth: 0,5cm
Distance between plants: 2-3cm
Distance between rows: 10-12cm
Full sun to half sun
Harvest: About 1,5 month after sowing, which can mean from May to October

Organic Radish 'Saxa 2'

Latin: Raphanus sativus
Swedish: Rädisa 'Saxa 2'
English: Radish 'Saxa 2'
Producer: Bröderna Nelson, purchased at ICA Maxi 7/6-2011

Radish is supposed to be a very easy vegetable to grow. It is recommended to be planted "among rows" of other vegetables as those may take a long time to grow while radish is very quick at growing. This makes the surface being exploited twice instead of only once.

Planted 8/6-2011 (See scheme for raised bed)
The raised bed contained for the most soil from the EcoCenter (low quality soil), but it was topped with high qualitative soil for vegetable cultivations from Hasselfors (2,5 bags).
I personally preferred to keep it in its own rows. Maybe little wasteful. Will have to consider another approach for next year maybe? Did not use any non woven, which actually I should as it is the recommendation of the producer.
13/6-2011: First plants already there, but I did not check before that as I was on a short vacation. So they do really grow very quick it seems.
5/7-2011: And this is the size by July.
Note: That's my hand, not a two-years-old's....

Producer's description
Easy to cultivate and can be harvested quickly after planting. Round and red radish. Can be sown among other vegetables as it will be ready for harvest before other vegetables are.
Producer's instructions
Can be sown as early as the soil is not frozen any longer up until September.
It prefers loose soil rich in organic material. To avoid attacks from insects, it is recommended to cover it with non woven.

Depth: 1cm
Distance between plants: 2-3cm
Distance between rows: 10-20cm
Full sun to half sun
Harvest: About 1,5 month after sowing, which can mean from May to October

Organic Beetroot 'Juwakugel'

Latin: Beta vulgaris L.
Swedish: Rödbeta 'Juwakugel'
English: Beetroot 'Juwakugel'
Producer: Bröderna Nelson, purchased at ICA Maxi 7/6-2011

Planted 8/6-2011 (See scheme for raised bed)
The raised bed contained for the most soil from the EcoCenter (low quality soil), but it was topped with high qualitative soil for vegetable cultivations from Hasselfors (2,5 bags).
Planted a whole row with these guys. Hope they taste good.
15/6-2011: First plant spotted.
 
Producer's description
Beetroot worth cultivating and with a good taste. With a round form and dark red color throughout. Suitable to be eaten as an early vegetable but also good pickled.
Producer's instructions
Do not sow too early as it could bloom. Sow May to Swedish Midsummer (around the 23th of June). Soak the seeds some hours before sowing to speed up their growth.
Prefers soil rich in organic material that keeps the moist.
Depth: 2cm
Distance between plants: 5cm
Distance between rows: 40cm
Full sun to half sun
Harvest: August-September

Big big vase and strawberries

Strawberries are very good. Found a type that sounded very good and was supposed to be sown in hanging vases.
So, well, a vase with a lot of openings seemed to me like a good planting option for such a kind of strawberries. Here it is:

Size is xxx and there are 9 openings (thought of adding more but it was indeed a very tedious work and got bored after the second one already... :O) ). Even though it does not look like much, it is rather large. Here there is a picture of me with it for reference:

It used a clay with 40% chamotte for stability. What exact kind I will try to find out.It took me 4 lessons to do this and it was pretty difficult as the clay kind of dried pretty quickly, which did not give very much time for "adjustments". When adding the openings, that were rather soft, a lot of cracks popped up when drying. Tried to repair them. They did not come back after the first nor the second baking. Some kind of "half cracks" are on the bottom but they are at least not visible. Hope the vase will survive my planting activities.

No glaze was used at all. The result was unsure. It could turn terracotta or brown and mine definitively turned out brown, even though there are some red (not really visible in the picture though) spots.

From the top, this is how it looks. 

As usual it is not a work of art, and it is definitively not precisely made, but I think it was pretty cool anyways. :O)
So now there are only two things left to do: planting and hope it does not crack!
3/7-2011: Strawberry plants got planted in the pot. The plants looked very small and suffering after planting. So some kind of "worry" about them not making it was definitely there. At the top, I also added one lippia dulcis plant.
5/7-2011: The plants had already grown. Look at the picture after 2 days from planting
Picture taken on 5/7-2011
 And also a shot of the lippia dulcis plant.
Let us see where it goes within one week or two if the growth is so noticeable after 2 days!

Weaving atmosphere

Finally, I decided to give up the idea of travel to a place where you could purchase salix as there is no suitable place around my town, or so the Internet says. The cost of traveling to any of the potential places would have excessed the price of the postage. Just not worth it. So after a lot of considerations, thinking, re-thinking, doubting, here I am with a big big bunch of salix. The whole 10kg.
So now I will weave. Or I will maybe think a lot about weaving and how to actually do it.... Cooooooool! Need to weave support for all plants now!!!!

onsdag 8 juni 2011

Raised bed for vegetables - Plant scheme

First bed part on the leftmost side of the bed was planted with vegetables that do not need watering more than during dry periods.
As far, 8/6-2011, it got planted with:
- Beet root
- Spring onions
- Radish
16/6-2011, we also added:
- Romaine salad
- Rocket


The Spring onions would like to be covered with non-woven, but right now we haven't had the time to do so.

Second bed part was meant to cover salad of different kinds. Salad needs regular watering. For this reason, there will be underground watering system between row 1-2, 3-4 and 5-6 (where the "toothpicks" between rows are placed).
See how it looks like right now:

- Beets ' Rhubarb chard'
- Mixed Leaf salad
Currently not planted yet, but it will come, is the roman salad for my beloved Caesar salad and probably rocket. But as rocket is sensitive for pest attacks, we can't decide whether to give it a try or skip it completely for this year.
Third part was planted with
- Zucchini
- Cucumber
Each plant group was placed about 30cm from each corner:
Z C
C Z
No picture available currently, but the "table above" may give an hint. Let us see what happens....
Both of those with double seeds to increase the chance of getting any plant of this cultivation.

The forth part was planted with pre-sown artichokes. Only two this year as the seeds from last year mostly died. We left them outside at winter time. Not a good idea it seems for seeds....
The plant standing was a parsley plant that got on our old vegetable bed by itself from somewhere else last year. We did not have the heart to throw it away so we have moved it around a couple of times. It has started turning yellow now though...


It turned out, we could not find any other vegetable to be planted that enjoyed sandy soils. Unsure... Have we made a bad choice in choosing to have one "sandy" bed?

On the 16/6-2011, we added the following:
- Peas
- Carrots
Carrots have been chosen at all because they are supposed to be grown on sandy soil. There seems to be issues with carrot flies, but well, if that is an issue then we'll know for the next year.
Peas have been chosen as "we" wanted peas, and there was no other place to put them.
The round part of it was planted with:
- green tomatos (those had been hanging out in the kitchen for a long time. But they were never re-planted and looked rather ill. Should have tried to acclimatise them a little first but who cares. They did not look any good anyways...
- Sugar pods
- French beans
When I get my neat salix "poking devices" I ordered telephonically last Saturday, I will try to do supports for these plants. If they are still alive, of course....
See scheme for fifth part:

This part will also require watering, but no plan for how a watering system should be placed has been decided yet.

Raised bed for vegetables - Soil choice

We decided to use different kinds of soils in the different parts of the raised bed.
The reason is that different vegetables require different kinds of soil.
E.g. zucchini and cucumber need some kind of compost or manure, while salad likes soil rich in organic material and some other prefer sandy soils.
This was the result from the distribution of soil.
Personally, I would have preferred to fill everything with good quality soil or at least much more than I did, but the beds are really very large. I think it contains around 2m^2 of soil to say the least. So the low quality soil delivered by the guy had to be ok.

Zucchini 'Diamant F1'

Latin: Cucurbita pepo
Swedish: Squash/Sommarpumpa 'Diamant F1'
English: Squash, Zucchini 'Diamant F1'
Producer: Bröderna Nelson, purchased at ICA Maxi 7/6-2011

Planted 8/6-2011 (See scheme for raised bed)
The raised bed contained for the most soil from the EcoCenter (low quality soil), but it was topped with cow manure from Plantagen (2 bags).
Planted 2 plants (actually 4, but I am supposed to remove the least nice of two plants).
28/7-2011: This did not go very well, really. Out of four seeds, only one gave a try at coming up but has nearly dried out completely already. 

Producer's description
Easy to cultivate, gives good harvest that can be used as cucumber, when cooking or even for pickling.
This sort of zucchini has average green shell.
Producer's instructions
Sow on warm soil in June, or pre-cultivate 3-4 weeks before planting outdoors. 1 seed/vase, keep it warm and light when growing. Should be covered with non-woven after planting outside. Harvest the fruits when small, of a size of a cucumber.
Depth: 2cm
Distance between plants: 100cm
Distance between rows: 100cm
Full sun
Harvest: July-September

Cucumber 'Moneta'

Latin: Lucumis sativus 
Swedish: Frilandsslanggurka 'Moneta'
English: Cucumber 'Moneta'
Producer: Bröderna Nelson, purchased at ICA Maxi 7/6-2011

Planted 8/6-2011 (See scheme for raised bed)
The raised bed contained for the most soil from the EcoCenter (low quality soil), but it was topped with cow manure from Plantagen (2 bags).
Planted 2 plants (actually 4, but I am supposed to remove the least nice of two plants).
Note: 28/7-2011 Not a single plant came up so no pictures at all! Maybe  because I did not put any fabric on it? Or what could have been wrong? Will try next year again but I will precultivate. Back to this subject in one year time... :O)
Note: 19/8-2011 Nothing nothing nothing. Let us precultivate next year really!

Producer's description
Easy to cultivate. Healthy and robust species with long, somewhat lumpy green skin. Good to be eaten as is.
Producer's instructions
Sow directly on sunny and protected spot in the garden when the soil reaches 15degrees Celsius. If earlier sowing desired, pre-cultivate indoors 3-4 weeks prior to planting outdoors, when night time frost does not occur any longer.
Requires large amounts of water and heat. Do not let the cucumbers become too large. Harvest often
Depth: 2cm
Distance between plants: 15cm
Distance between rows: 125cm
Full sun
Harvest: August-September

French Beans 'Milagrow'

Latin: Phaseolus vulgaris
Swedish: Brytböna ' Milagrow'
English: French beans 'Milagrow'
Producer: Bröderna Nelson, purchased at ICA Maxi 7/6-2011

Planted 8/6-2011 (See scheme for raised bed)
The raised bed contained for the most soil from the EcoCenter (low quality soil), but it was topped with high qualitative soil for vegetable cultivations from Hasselfors (3 bags).
Planted 5 plants.

Producer's description
Easy to cultivate, gives large harvest of dark green French beans. To be eaten cooked with some suger or au gratin.  Can be frozen after quick parboil.
Producer's instructions
Sow when the earth reaches 15degrees Celsius. Soak seeds a couple of hours before planting. In the north of Sweden, it needs to be precultivated indoors in cool temperature and in light conditions. 1 seed per vase 2-3 weeks before planting outdoors. Otherwise, it can be cultivated directly outdoors on any soil.
Depth: 3cm
Distance between plants: 12cm
Distance between rows: 45cm
Full sun
Harvest: August-September

Sugar Pods

Latin: Pisum sativum L.
Swedish: Sockerärtor 'Oregon Sugar Pod'
English: Sugar pods 'Oregon Sugar Pod'
Producer: Bröderna Nelson, purchased at ICA Maxi 7/6-2011

Planted 8/6-2011 (See scheme for raised bed)
They do not grow very quickly.... Still very small after nearly two months. Loosing hope on these guys. I guess, it needed to be precultivated also?!
This is how they looked like after one month:
5/7-2011


Producer's description
Species worth cultivating. Gives pods in late Summer under a long period of time. The length of the pods will be about 10cm. Resistant against pests and other plant diseases.
Producer's instructions
Plant early, as soon as the earth is not frozen any longer until mid-june.
Plant in a row.
Appreciates soil rich in organic material, but is fine with most types of soil.
Water when dry weather.
Harvest within 2 months from planting.
Should be harvested before the pods start becoming round.
Depth: 3cm
Distance between plants: 6cm
Distance between rows: 50cm
Full sun
Harvest: July-October

måndag 6 juni 2011

American Blueberries 'Northblue'

Latin: Vaccinium corymbosum (x angustifolium) 'Northblue'
Swedish: Amerikanska blåbär 'Northblue'
English: Swamp Blueberries 'Northblue'

2/7-2011
Received the plant somewhere in March but I could not plant it outside before we got our flower beds enlarged. That was guessingly something around 31st May or 1st of June. But it could as well have been one week after. Unsure right now. By that time the plant had started loosing all flowers and no real blueberries were left on the plant. The plant itself had started looking like crap also.

Producer's description
Small plant of about 60cmn, it gives a lot of flowers in the spring and later round and light blue fruits with a diameter of about 2cm. The fruits are sweet and with aromatic. This variety is fitted for heights.

Additionally, the sticker I got from the producer says the following:
Height: 1,25cm (not 60 as above) -
Flowering time: April-May
Harvest: July and August
Pruning: Not recommended

Unclear what information is the correct one. Well, this we will know in a couple of years if no dumb rabbits or bambies come around before I guess?! Maybe something went wrong in the order. In the catalogue it says (x angustifolium and 60cm, but none of these two statements can be found on the etiquette. Probably got the wrong sort?)

Planted in the blueberry bed.

torsdag 2 juni 2011

Dahlia Honka Surprise

Dahlias are rather wimpish, but somehow there is something to them that makes me purchase them in industrial quantities anyways. Last year we purchased quite a few ones via a Dutch mail-order firm called eurobulb.nl or similar. We had them in vases with peat (it was supposed to be a good idea according to what I read) in the house for a long time until they became rather tall. That was a serious mistake. When we started moving them outside, most of the stems broke in half and most of the dahlias did not develop fully or they died completely.

One of the few that actually survived was Honka Surprise. Which was very good as it is indeed really cool. See here:
20/7-2011
It did not have so many flowers but the few it had were worth the whole fuzz... Unfortunately, it is rather tall (over one meter) so it requires support.

So this year, we decided to buy it again (no, we do not have the patience for keeping them alive over the winter. But they are so cheap, it is really not worth it).
It has grown a little bit, and we have already started moving it outside now as it is very little and we hope it won't break. As it is over 15 degrees tonight, all plants will stay outside. First step towards their full garden life...
Retrospective 21/8-2011: Moving it outside when it was very small was definitively a very good idea. The plant is now over 60 cm high and nearly as wide.
14/8-2011
It also has a lot of blossoms and 3 flowers.
14/8-2011
It looks very majestic compared to last year's sticks that could not stand by themselves at all. We have not used any support yet and it does not seem to fall at all.

Cherry Stella

Latin: Prunus Avium Stella
Swedish: Sötkörsbär Stella på GiSeLa stam
English: Cherry Stella Gisela graft

We actually purchased some cherry tree via some mail-order firm together with quite a few other plants some year ago, but as everything else we purchased there, it was crap. Tip: keep away from Bakker. :O( Or really, it was mostly a dry poking device to start with. We spent a lot of time to create a neat raised bed for it, but it did not help at all. It did not even have any developed root system at all by then. Not sure what the name was but I think it was Cordia. Here is some proof:
Not very decorative, I would say... So after one year, some month ago, we actually took the big step and threw it away.
But cherries we need, or rather I do as Janne is allergic to them.
So some more research showed that cherries can become very large, which indeed some of the neighbor trees really prove. In all directions indeed. As I want to be able to pick cherries without a lot of fuzz and as there is not so much space in front of the house for a large tree, we wanted a kind that did not grow so much. It turned out that cherries grafted on Gisela stem do not grow as much as the others. Stella was a self-fertile sort furthermore so the choice was nearly given.

Purchased it last Sunday 29/5-2011 at Trädgårstorget in Linköping. It is an E-plant so we hope for it to be healthy.
Height: Stem 80cm, top point: 160cm (6/6-2011)

So now there it stands, in the old raised bed. At least, planting it went quick this time.


onsdag 1 juni 2011

Hydrangea Endless Summer Twist-n-Shout

Latin: Hydrangea macrophylla TWIST-N-SHOUT 'PIIHM-I' (PPAF)
Swedish: Hortensia Endless Summer Twist-n-shout
English: Endless Summer Twist-n-Shout Bigleaf Hydrangea

I have seen this plant in plant schools a few times and they always looked very beautiful. They are supposed to get either blue or pink flowers depending on soil type used, but this plant seems to keep pink and I do not have any complaints. Apart from the fact that it gets somewhat brownish flowers, I still think their form is special and unique and their color brilliant. Note also that the leaves have a very darkish shadow that gives this plant an additional "something special".

(28/7-2011) The plant is not growing very quickly and the flowers to look little sad rather often. Have started now to cut away the brownish flowers and let us hope new ones will thrive:
26/7-2011
And by the way, they are still pink: either the soil is not peat or the flowers don't care about acidity and the producer's only telling bull....

Historical background
Bought this plant on Sunday 29/5-2011 at Blomstertorget in Linköping. We were though able to plant it today, Tuesday 31/5-2011 only as the garden makeover took much longer than planned. Today the sour flower bed was kind of finished. We planted it into something that was supposedly peat, which is what hydrangea should get as far as I understood. As I did not trust the guy that delivered the "peat" or whatever he called peat, we actually had a drive to Plantagen and purchased a bag of good quality peat to have in the vicinity of the roots... Better safe than sorry...

The color though will be pink in alkaline soils and blue in acidic soils. Let us see if we like the blue and if we don't we'll have to move the guy to a place with alkaline soil instead.
Height: Top point 40cm

2/7-2011: Flowers are now present. They are very beautiful according to my taste. But unclear why they are not blue at all. On the other side, I like exactly as they are.


I am though little worried about the fact that the flowers get easily "dried out". I wonder why this is the case.
Note 28/7-2011 - gave the plant a sprincle of rhododendron fertilizer. Let us see if it helps.


Producer's Description
According to Splendor plant, Twist-n-shout in the Endless Summer® Collection produces abundant blooms on both old and new wood all summer long. Lacy deep-pink centers are surrounded by gorgeous blossoms of pink or periwinkle blue, depending on soil type. Sturdy red stems and glossy deep green leaves turn red-burgundy in fall to offer year-round interest in the garden. Easy to care for and hardy to zone 4, Twist-n-Shout is an elegant stand-alone specimen, dramatic in combination with other plants, and compact enough for containers.
Flowering time: Flowers all season long, repeat blooms
Height and width: about 1,5m
Hardiness: Zone 1-4

Producer's Instructions
Partial shade
Keep soil moist
Fertilizing: Slow release fertilizer in spring, no feeding after August 15th